Test the ZITADEL Management API with Postman

Developer Advocate
- Introduction
- Add a New Service User to call the Management API
- Provide Admin Permissions to the Service User
- Create an Access Token for the Service User
- Create a Project via the Management API
- Create an Application via the Management API
- Create a User via the Management API
- Try it out Yourself
Introduction
In our previous two posts, we explored testing with Postman the PKCE Authorization Code login flow for web applications and token introspection. This time, we'll show you how to bypass manual setups in the ZITADEL Console by using Postman to programmatically create projects, apps, and users. To get started, you'll need to set up a service user and secure an access token, which will enable you to interact with the ZITADEL management API effectively.
Add a New Service User to call the Management API
Go to Users in the console. Next, click on the Service Users tab.
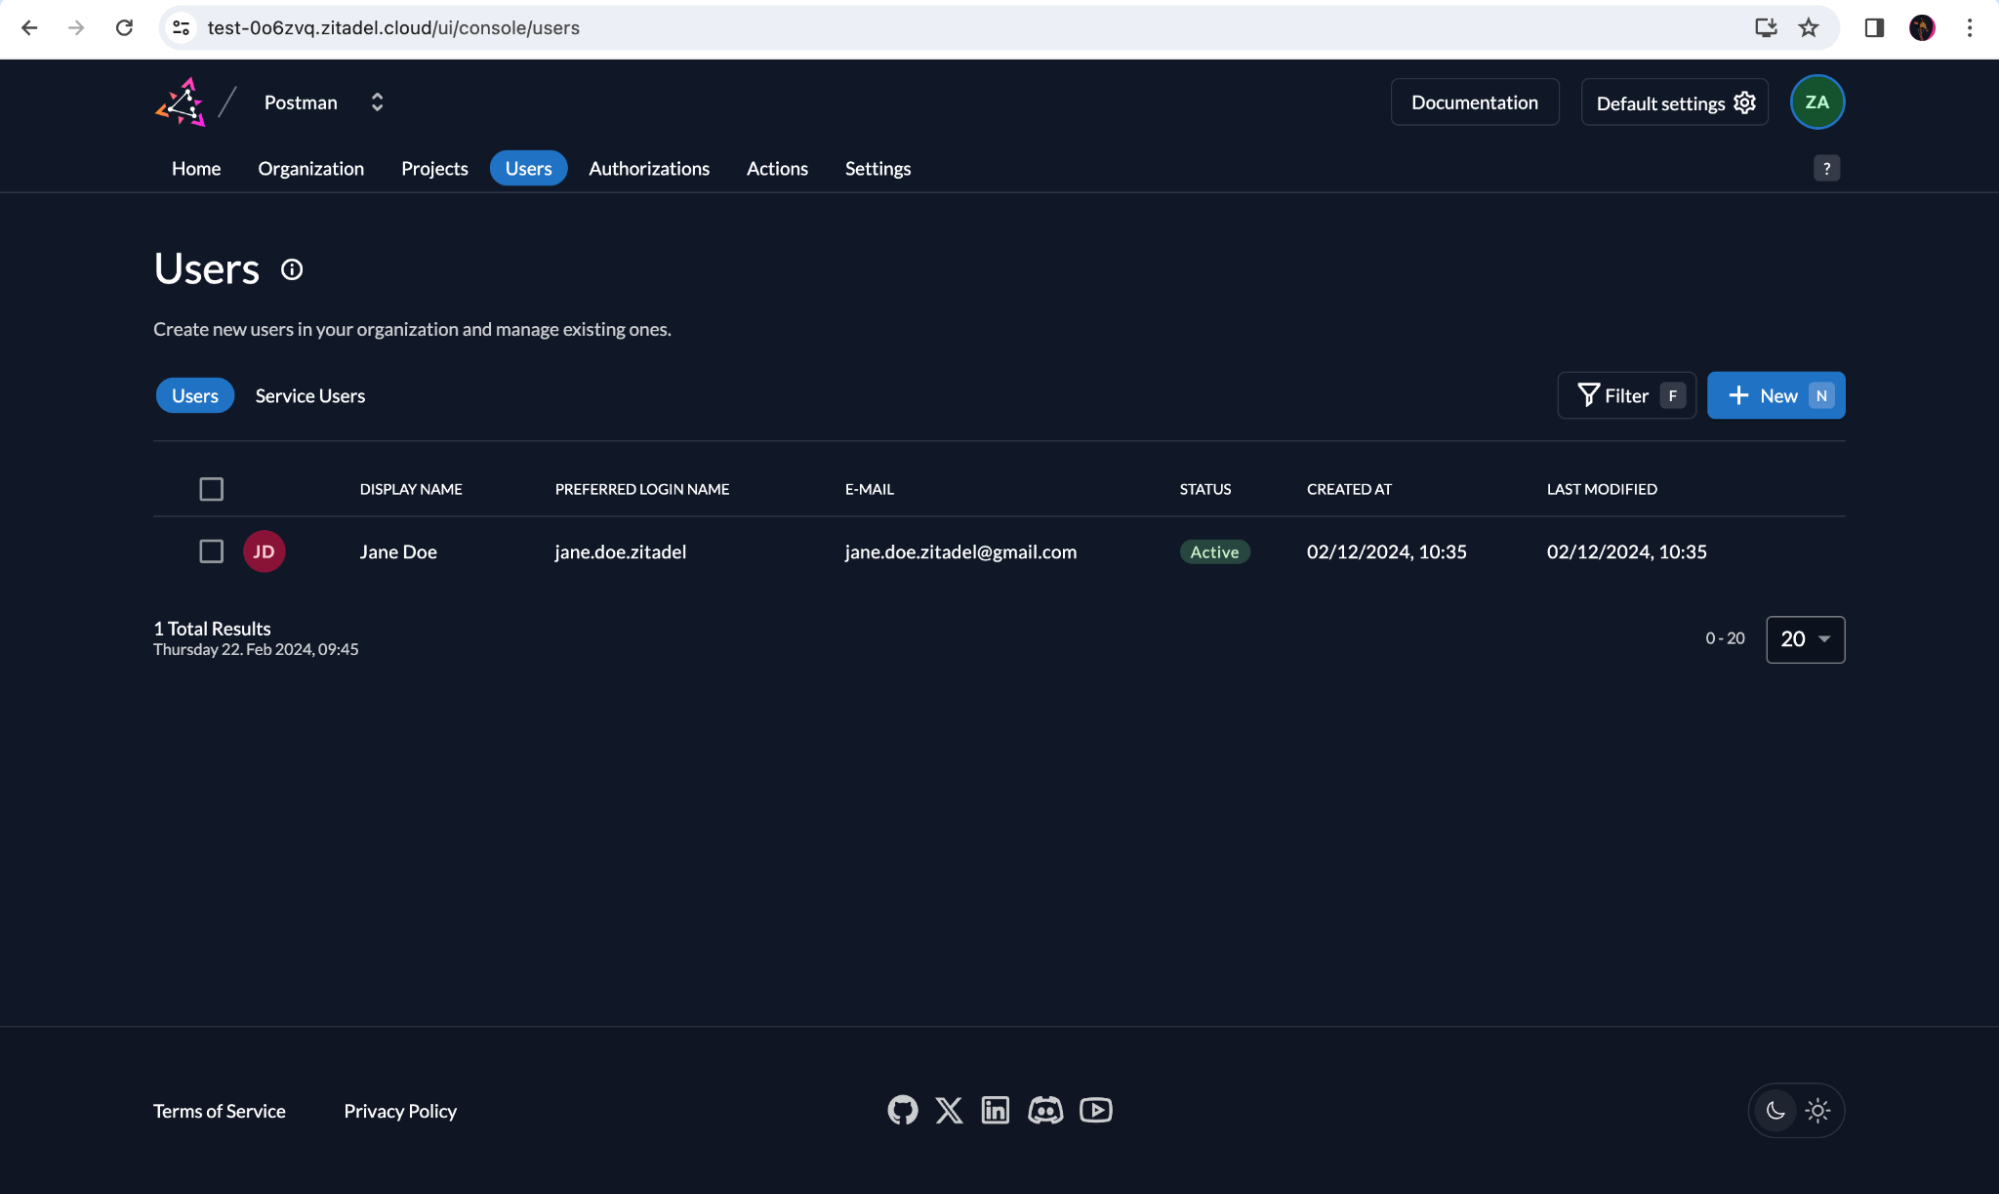
Click on +New
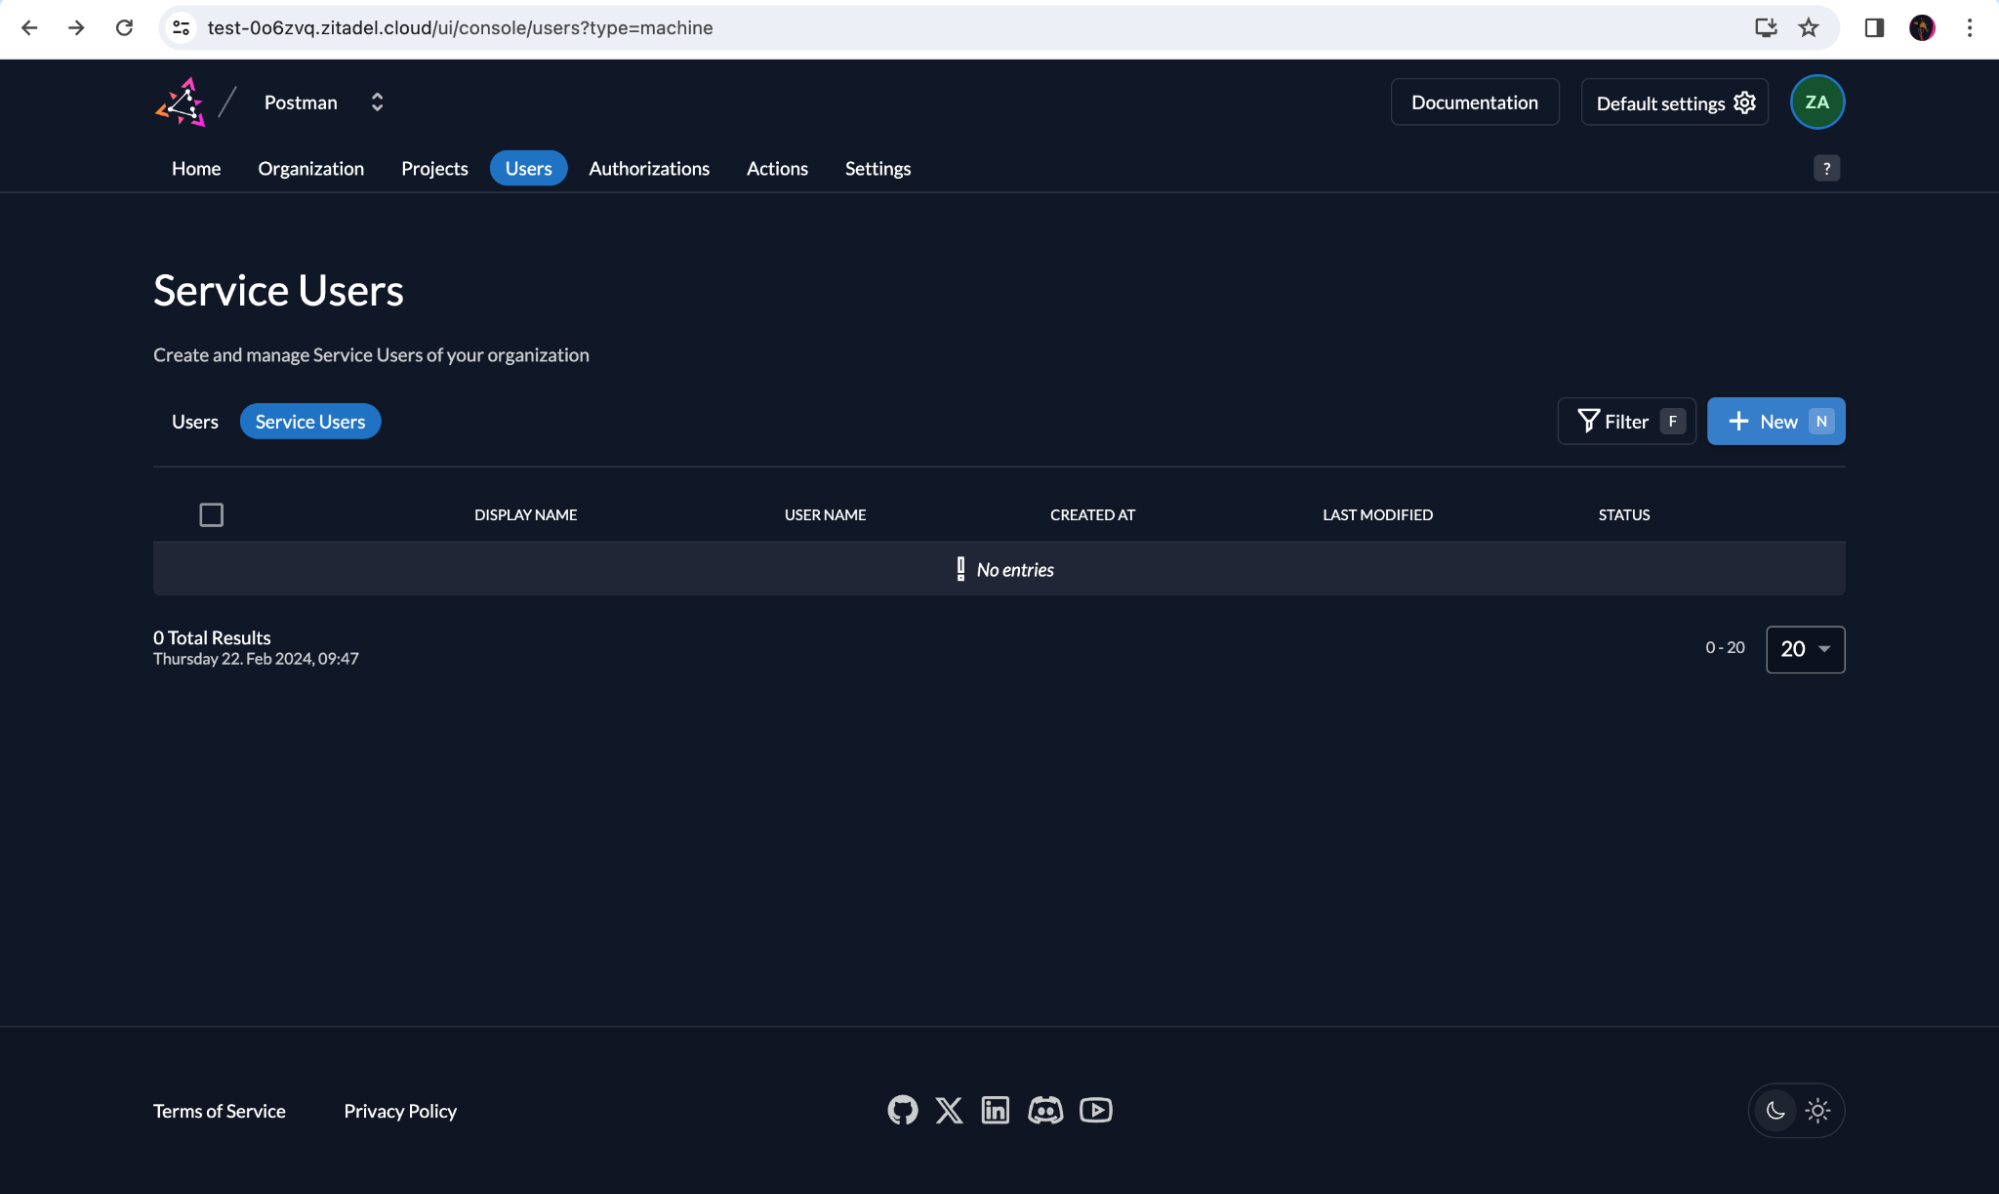
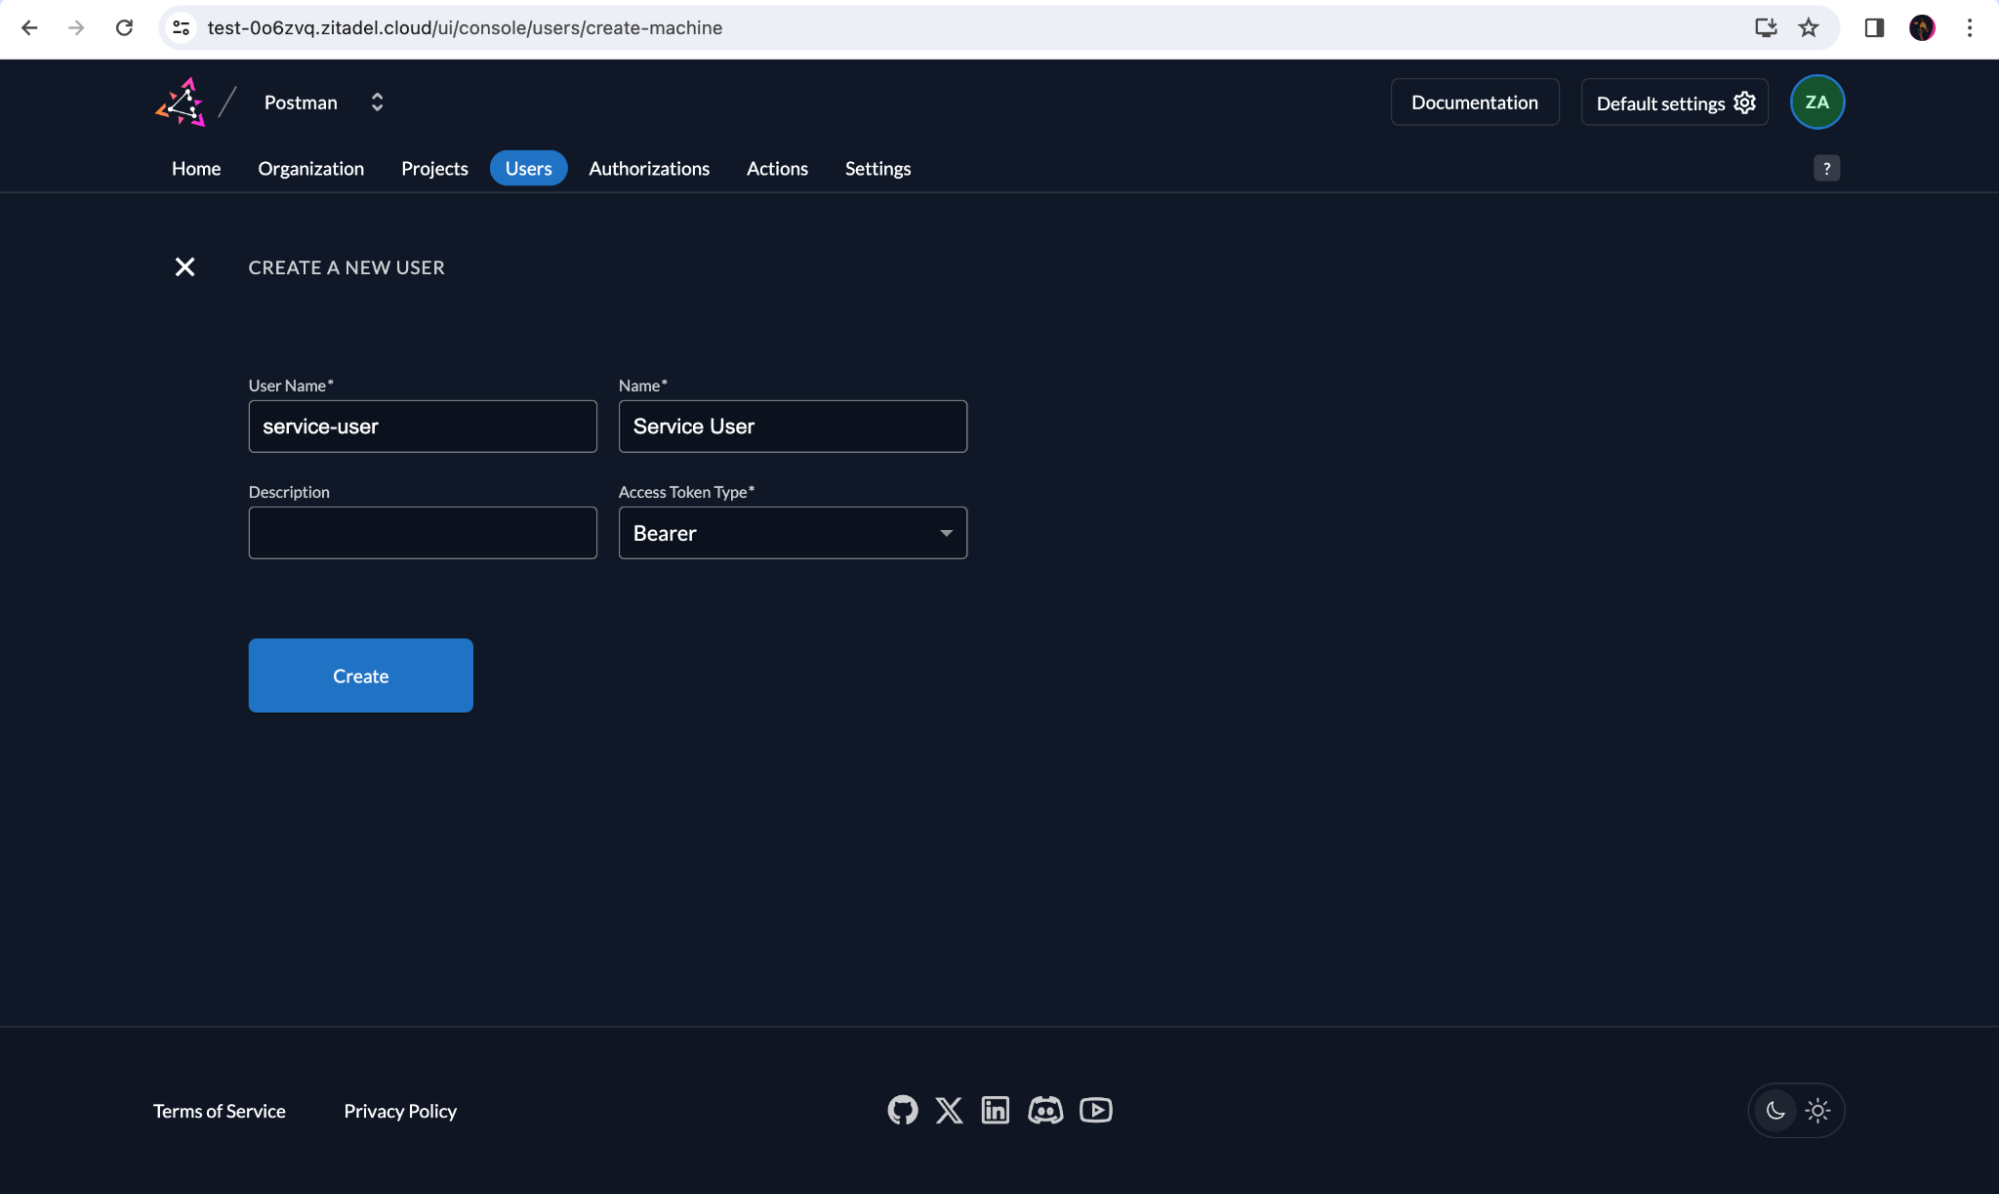
Next, add details and create your service user.
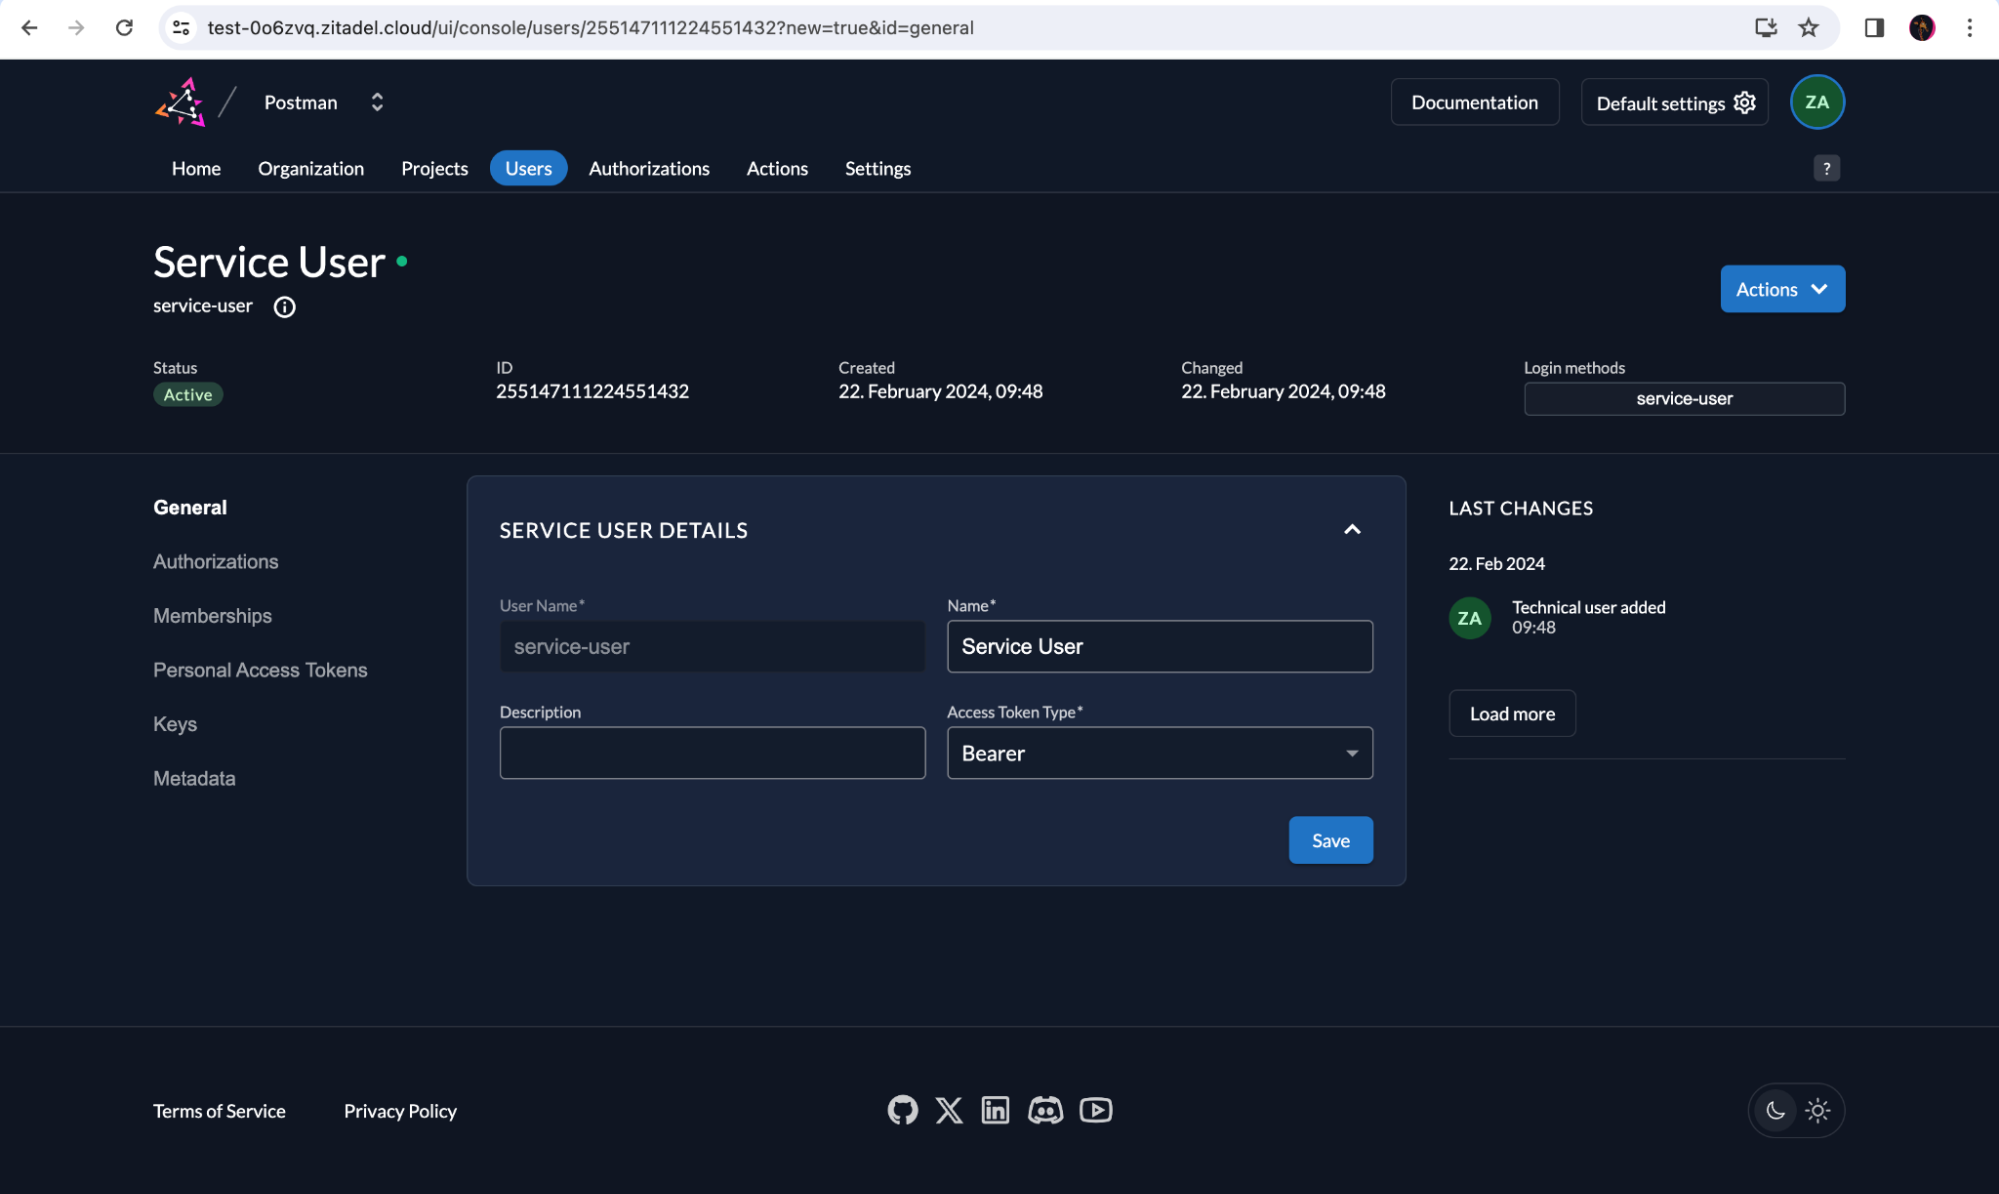
Provide Admin Permissions to the Service User
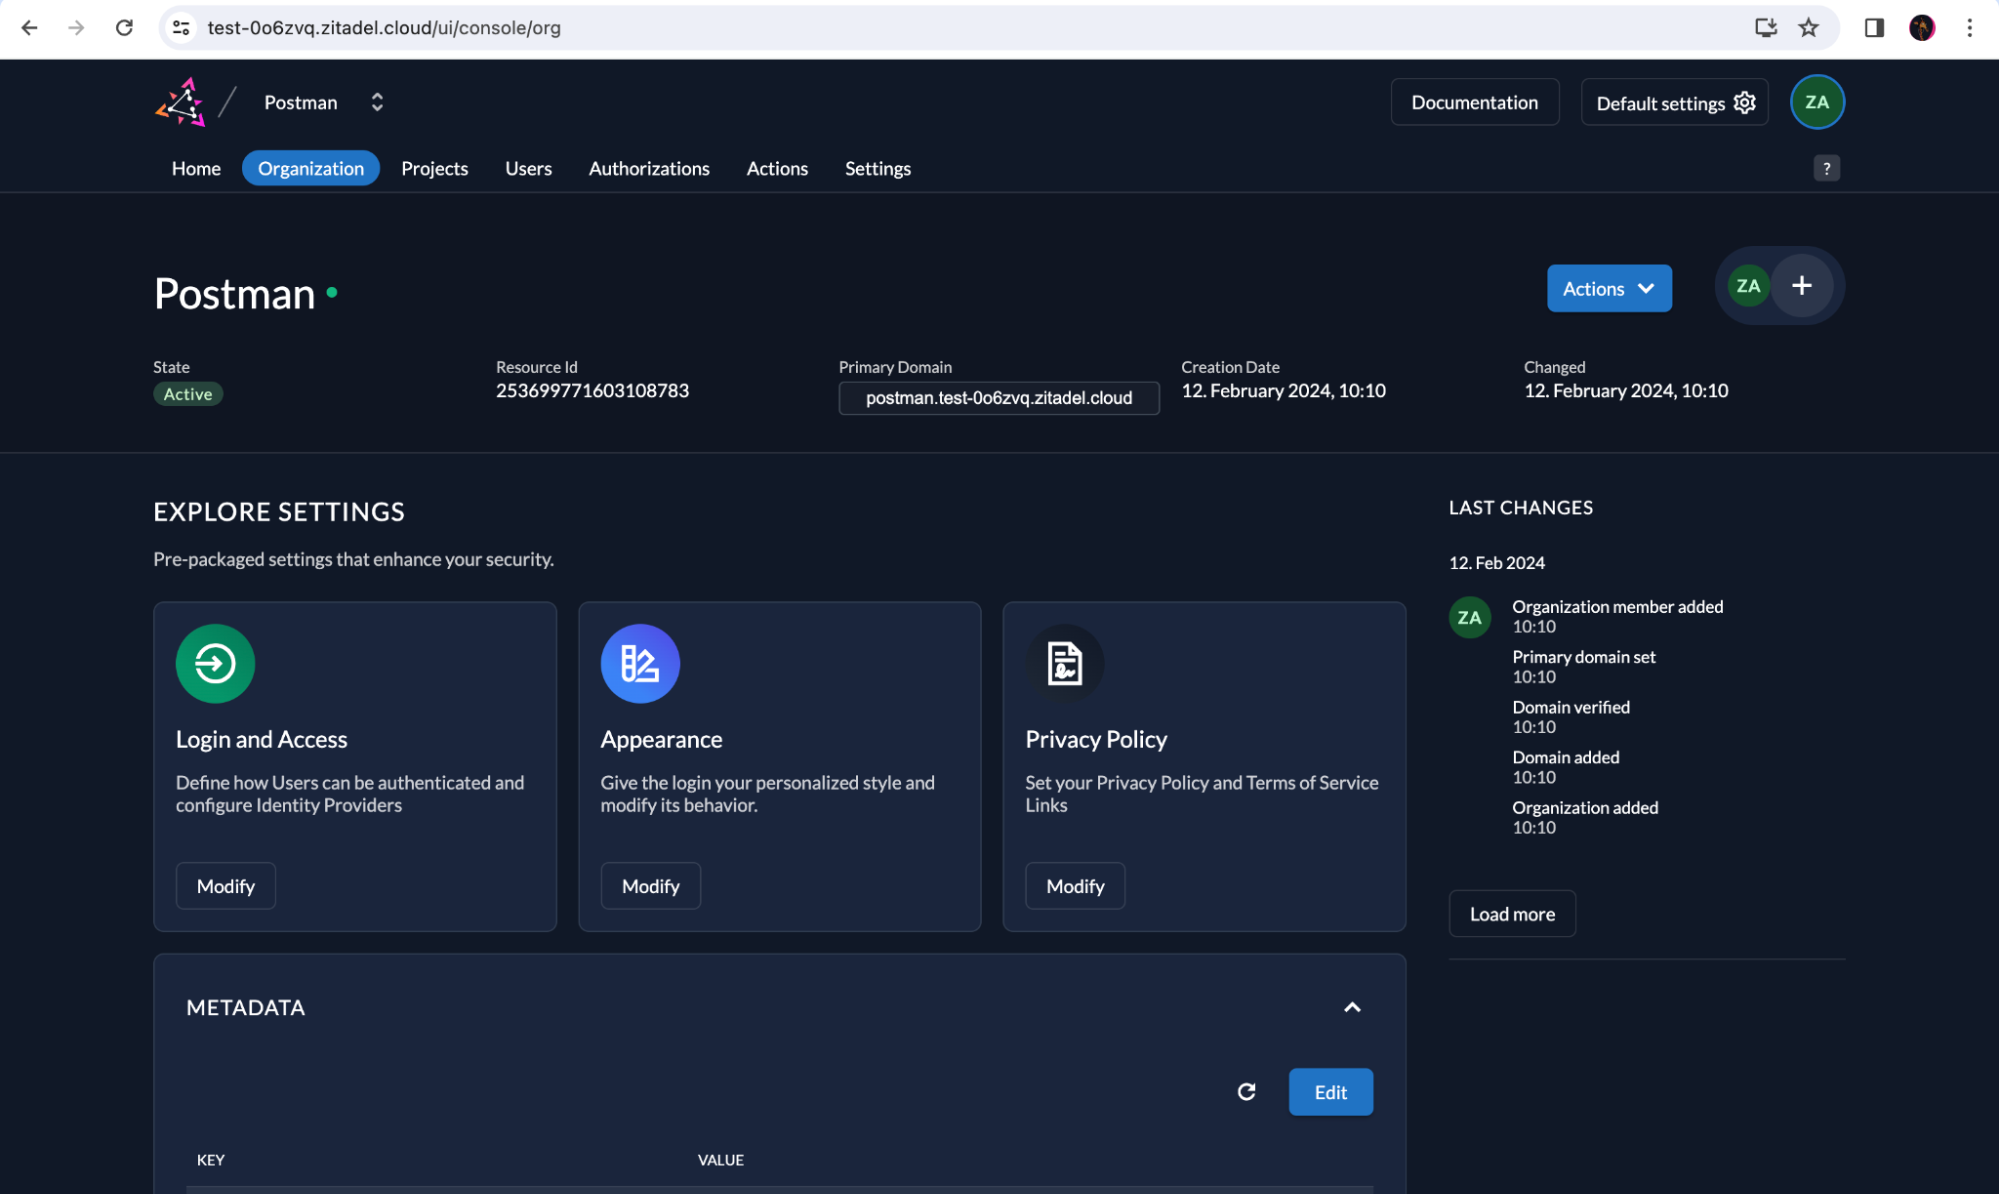
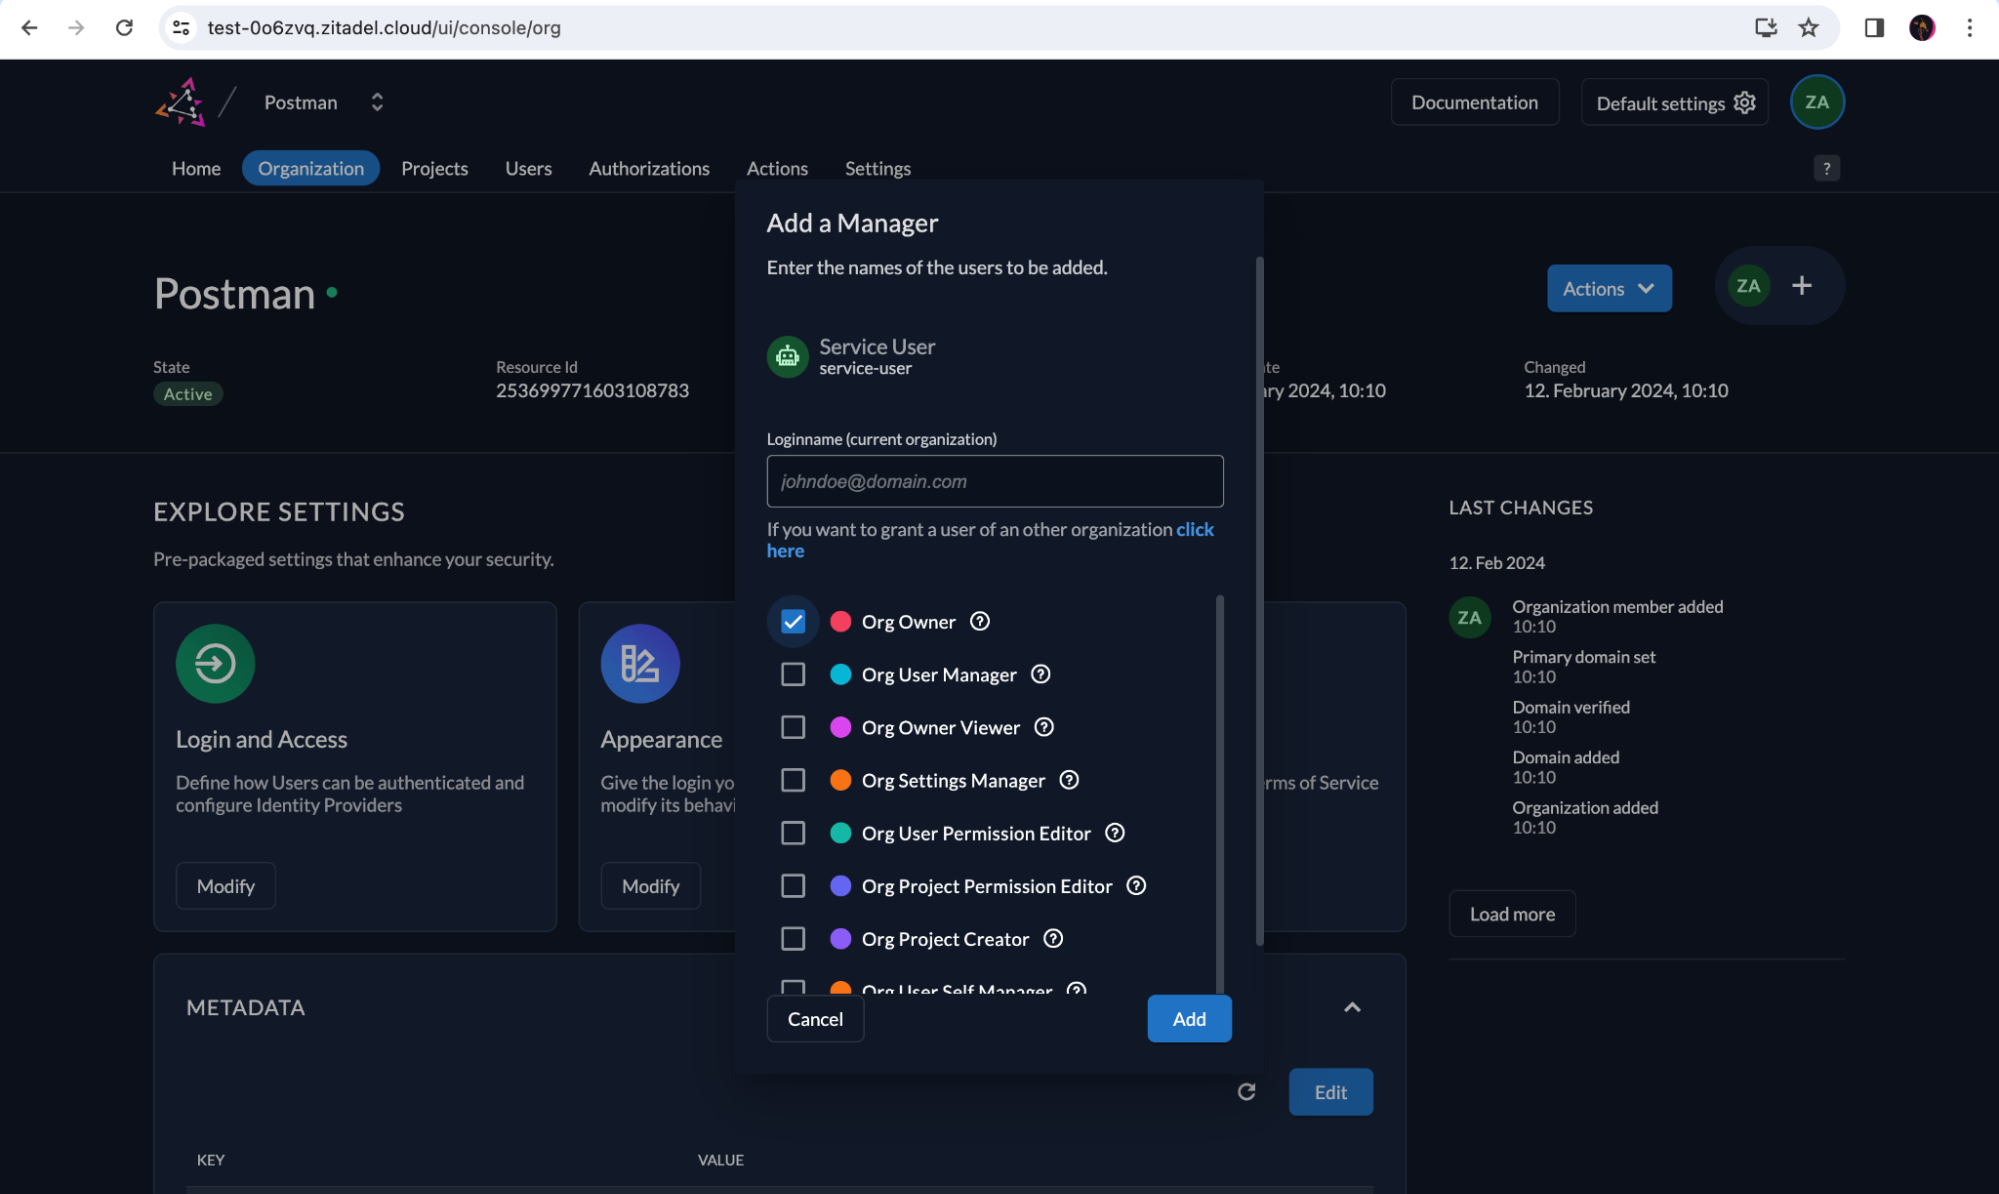
Now you have to add the Service User as an Organization Manager. Go to the Project and click + next to ZA.
Now choose Service User as the Org Owner. Or you can select the relevant roles based on what he can do in the project.
Create an Access Token for the Service User
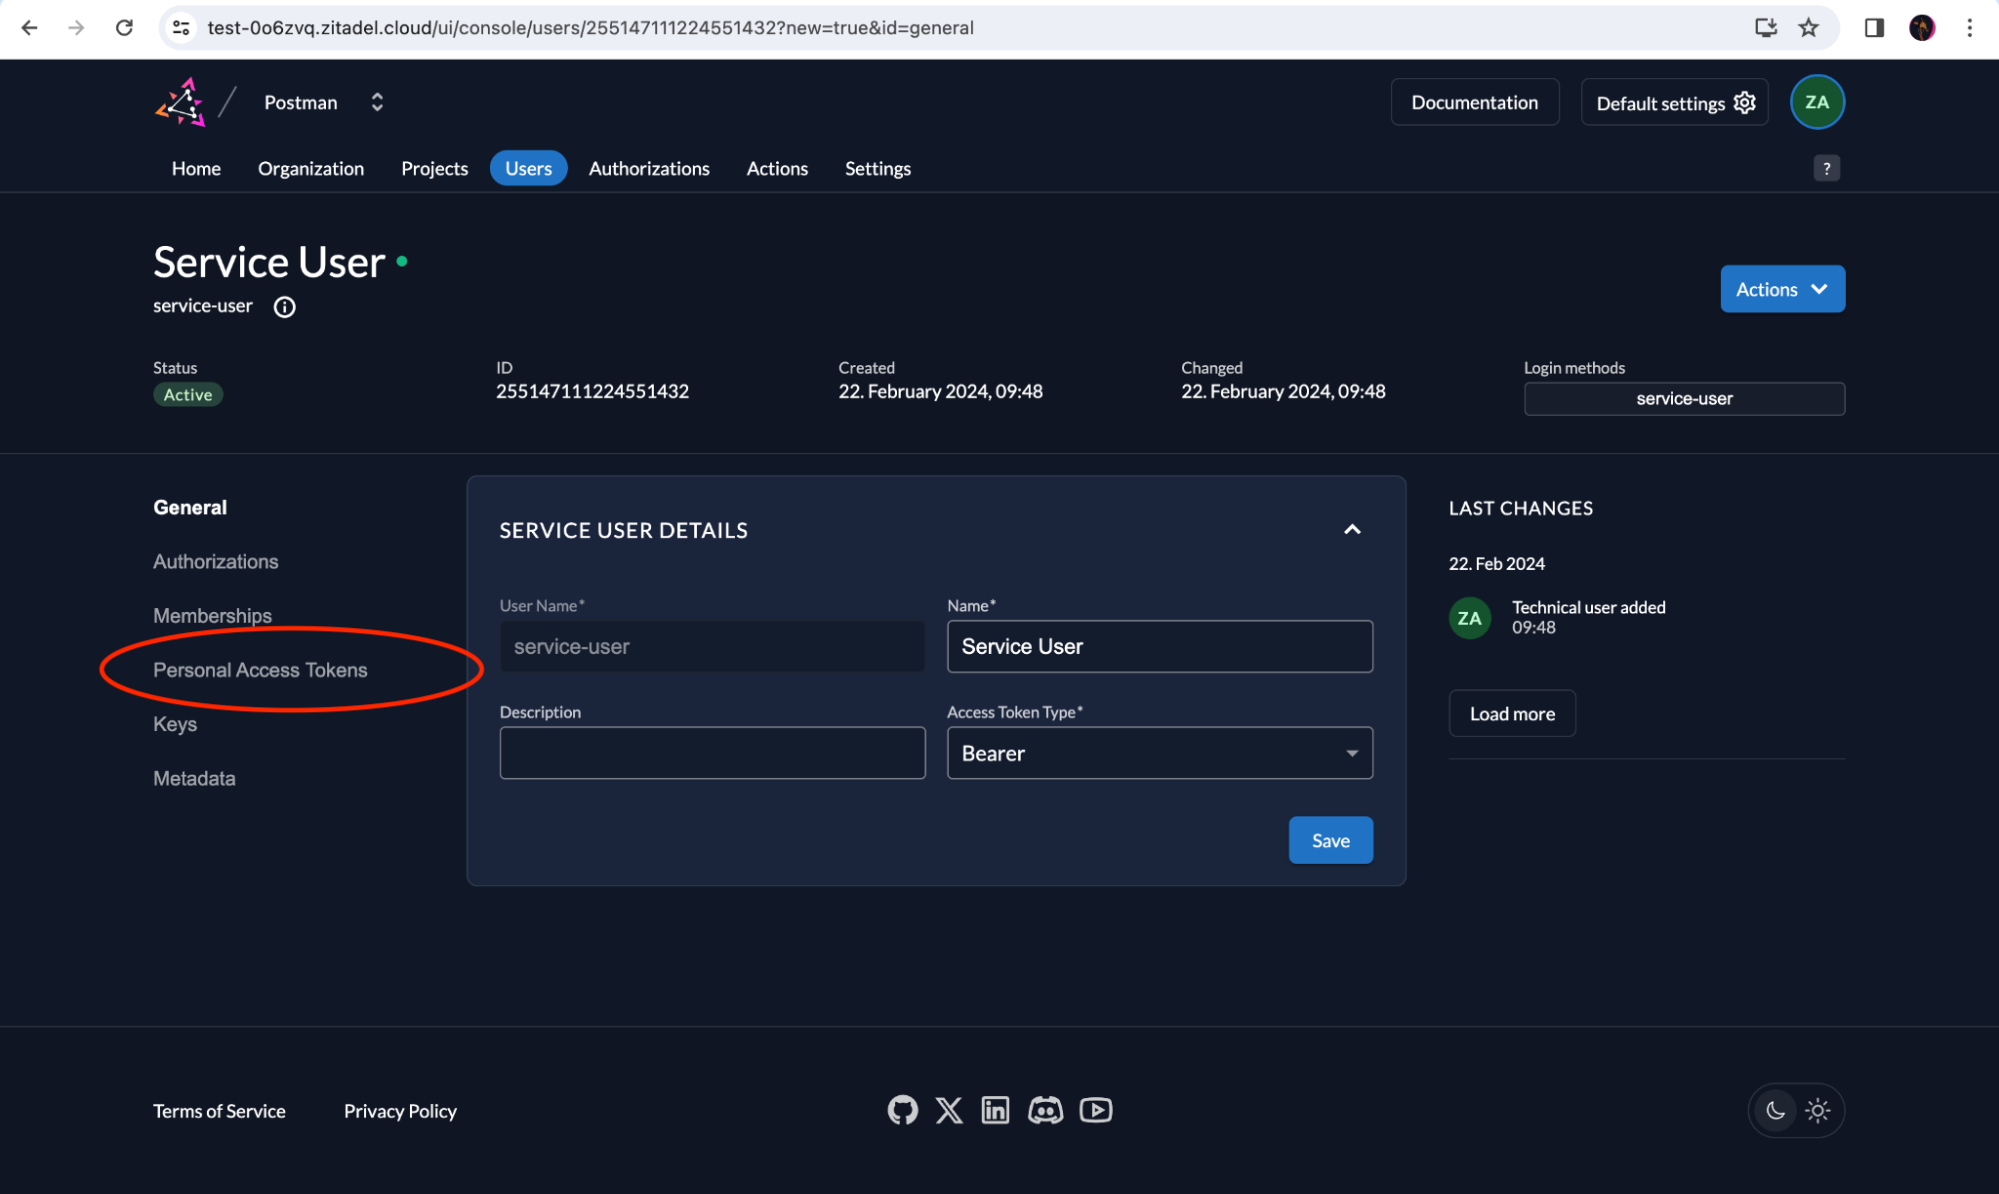
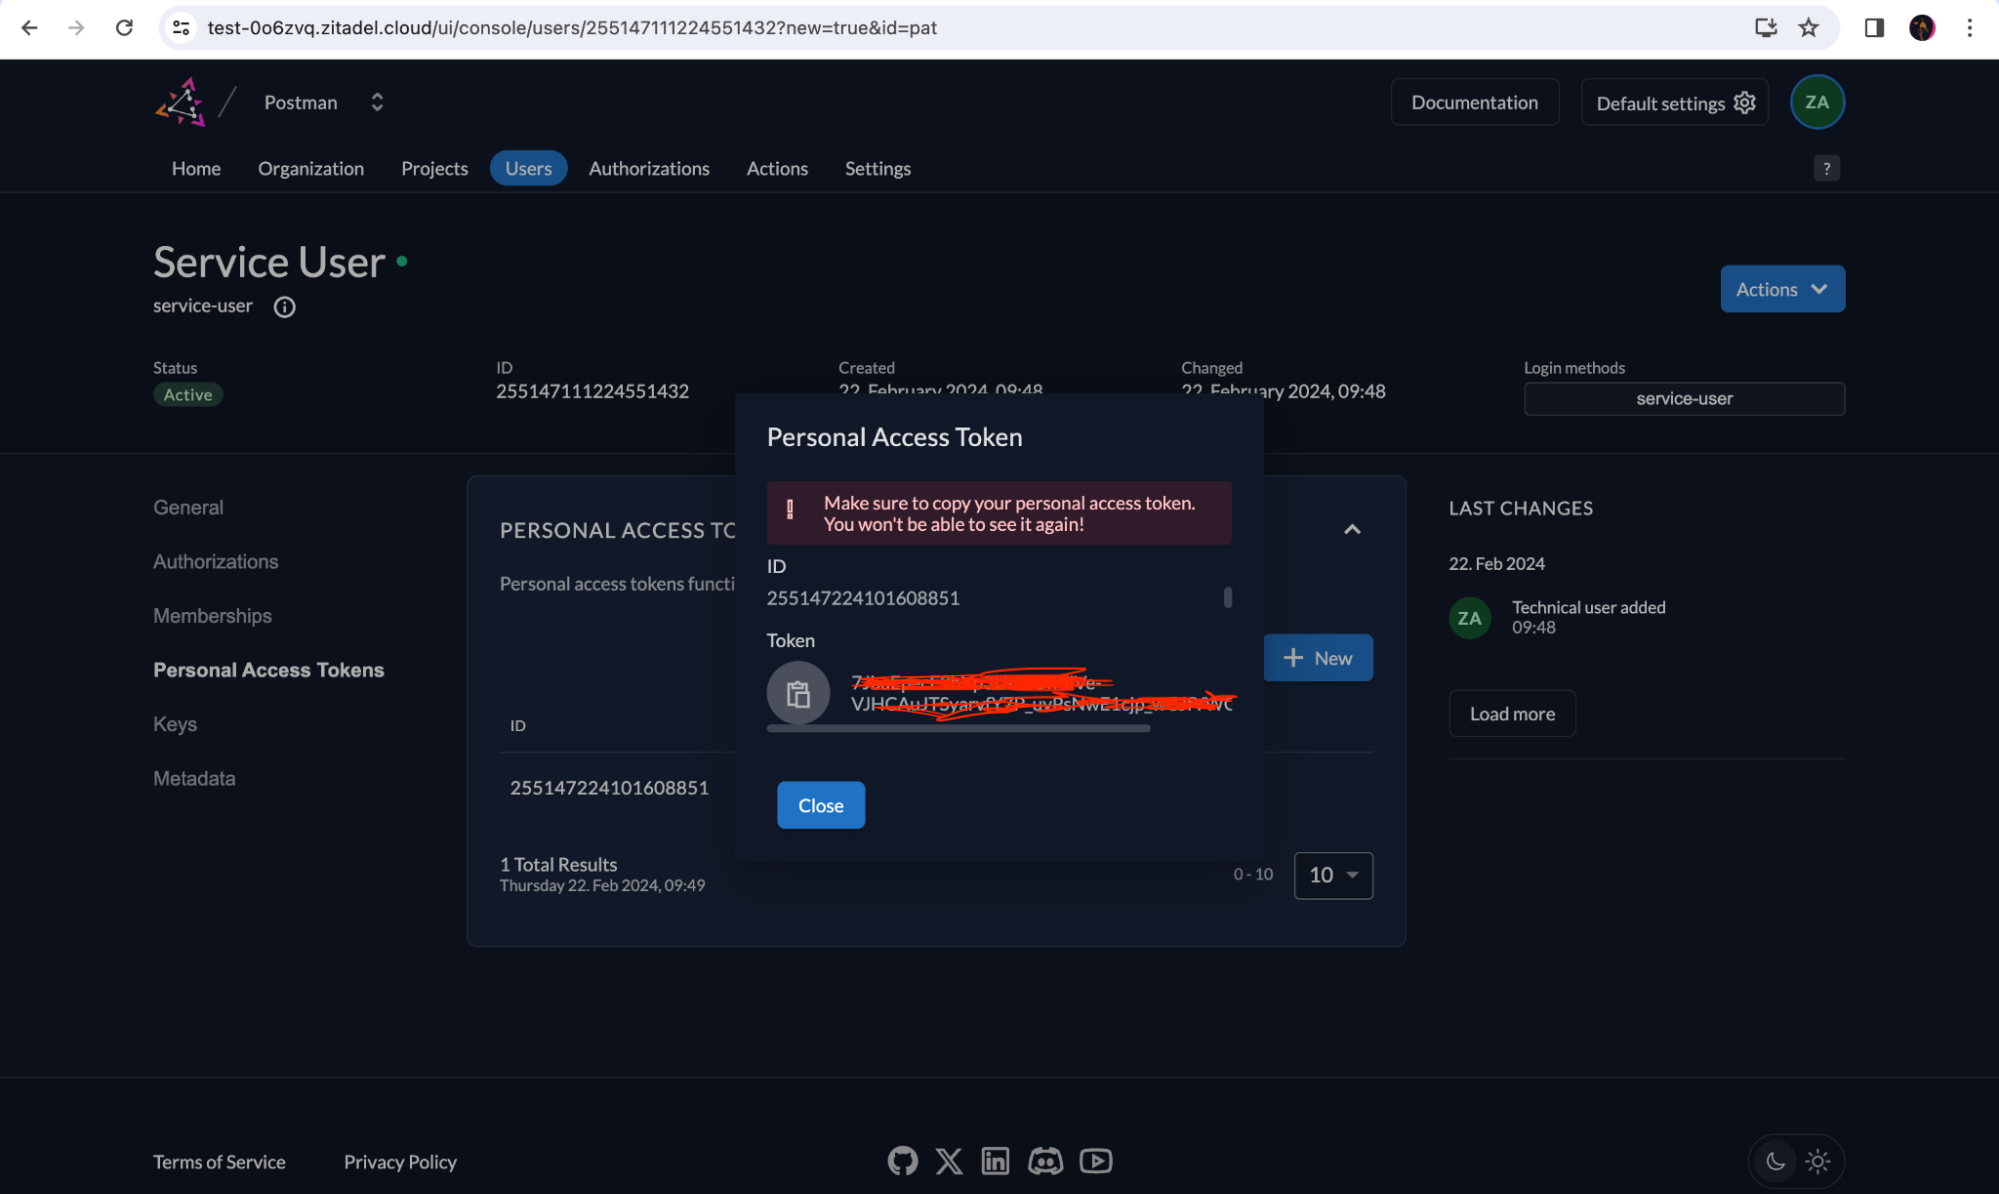
Now go to the Service User’s profile again. We’ll create a Personal Access Token (PAT) to set up things quickly. You can choose to go ahead with Client Credentials as well, but for this demo, we’ll be choosing the Personal Access Token.
Create a Project via the Management API
You can find more details on how to call the Management API to create a ZITADEL project here.
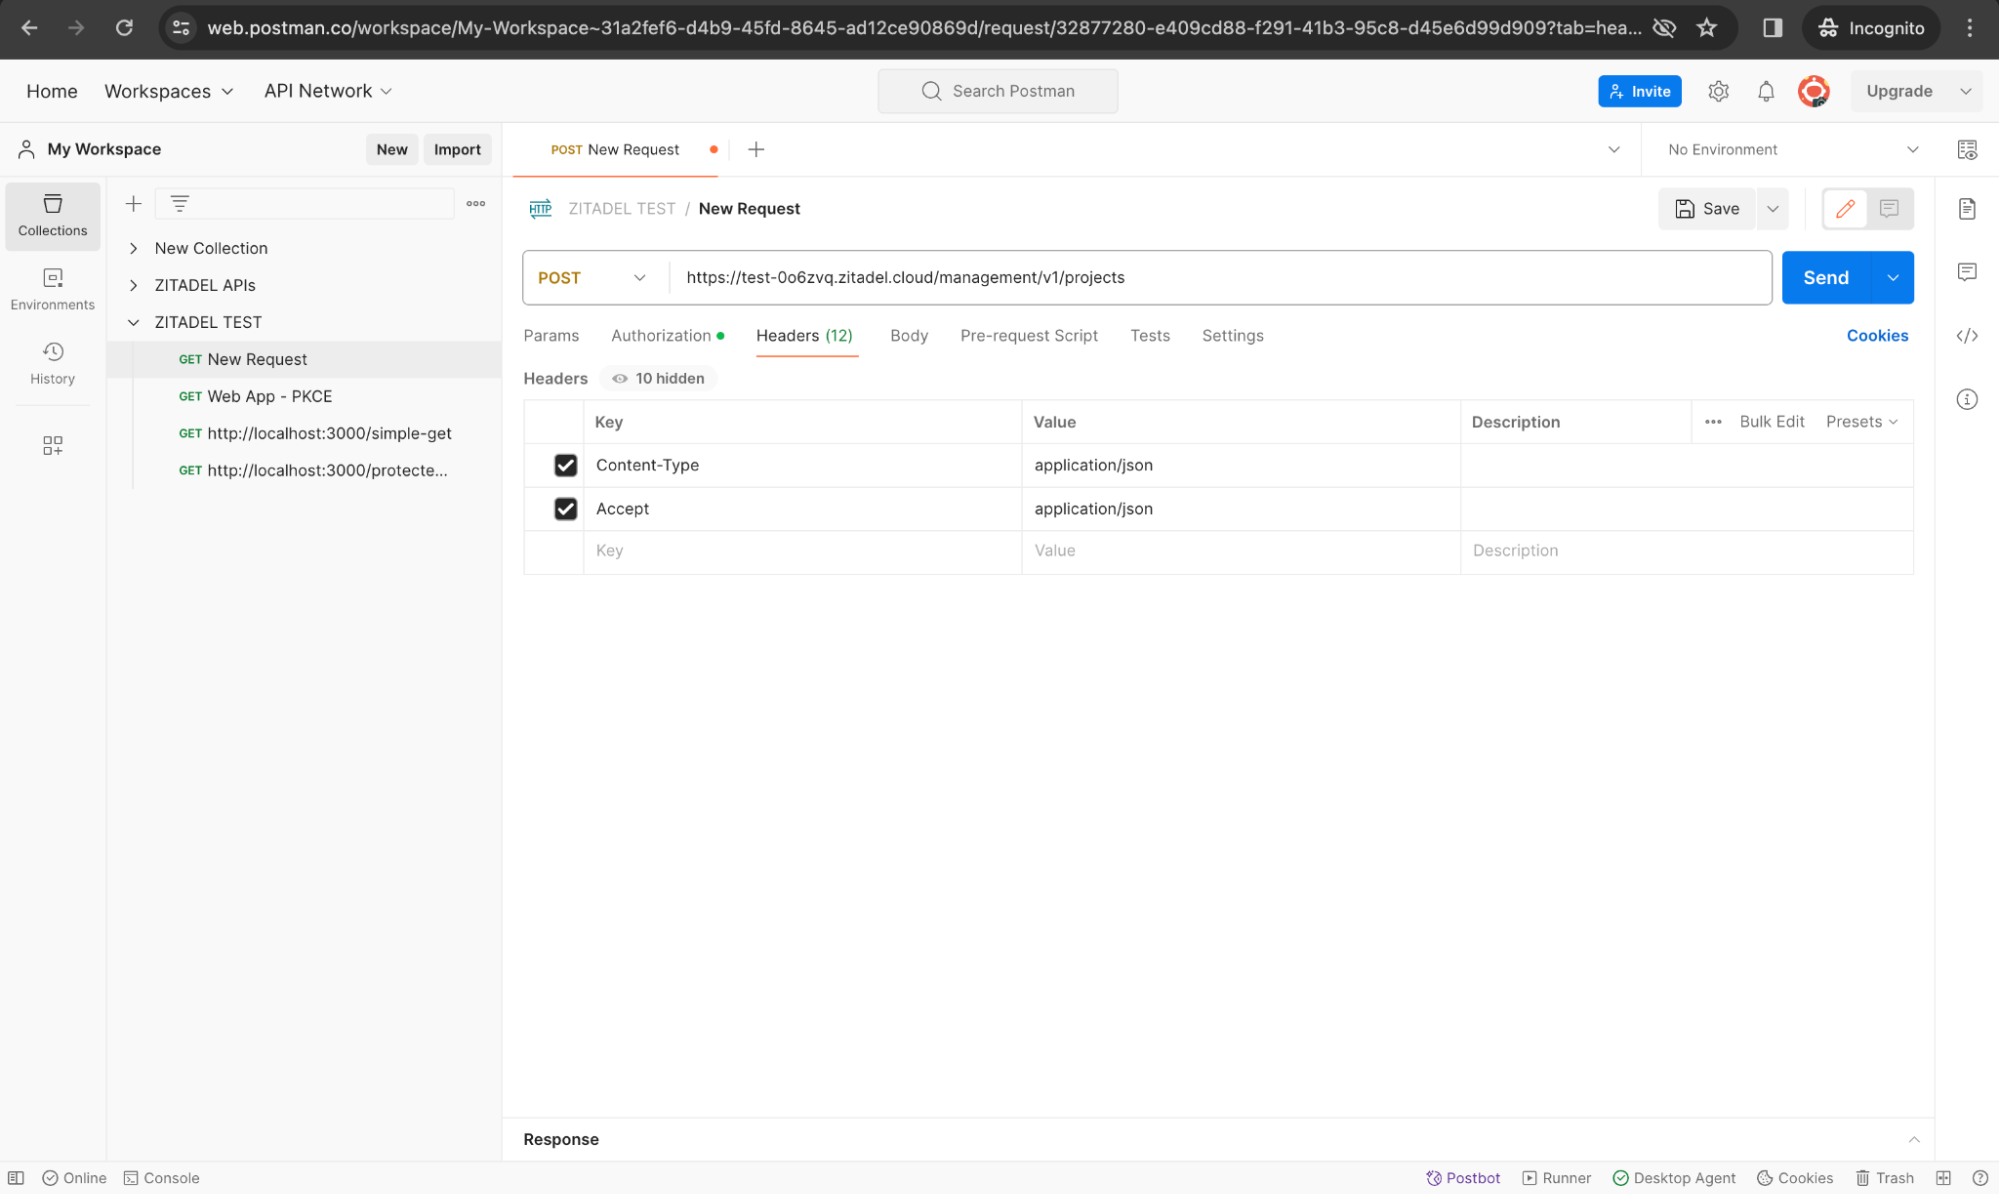
Create a new API request and add the headers as shown below.
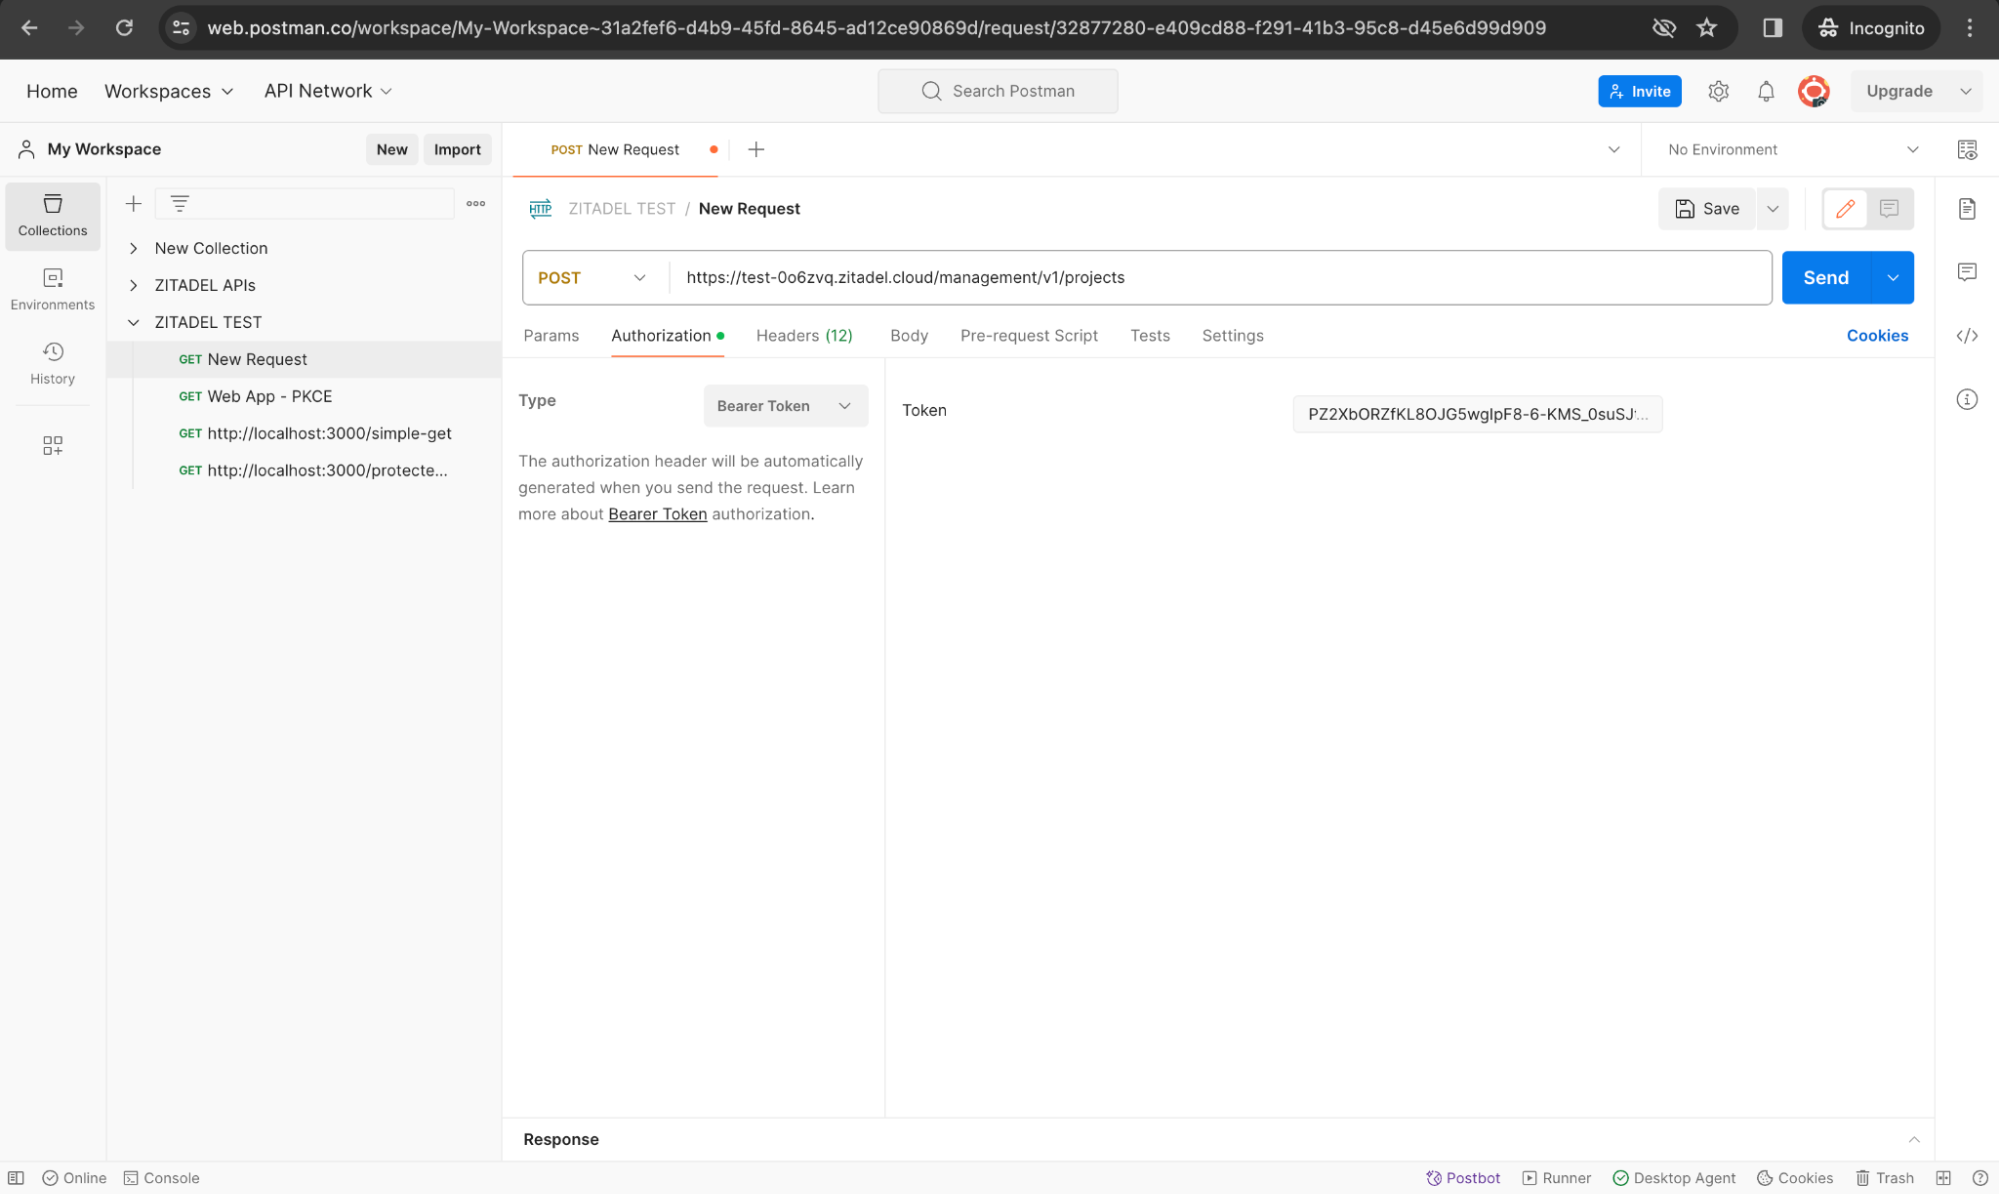
Authorization Type should be Bearer and you can add the PAT in the Token field.
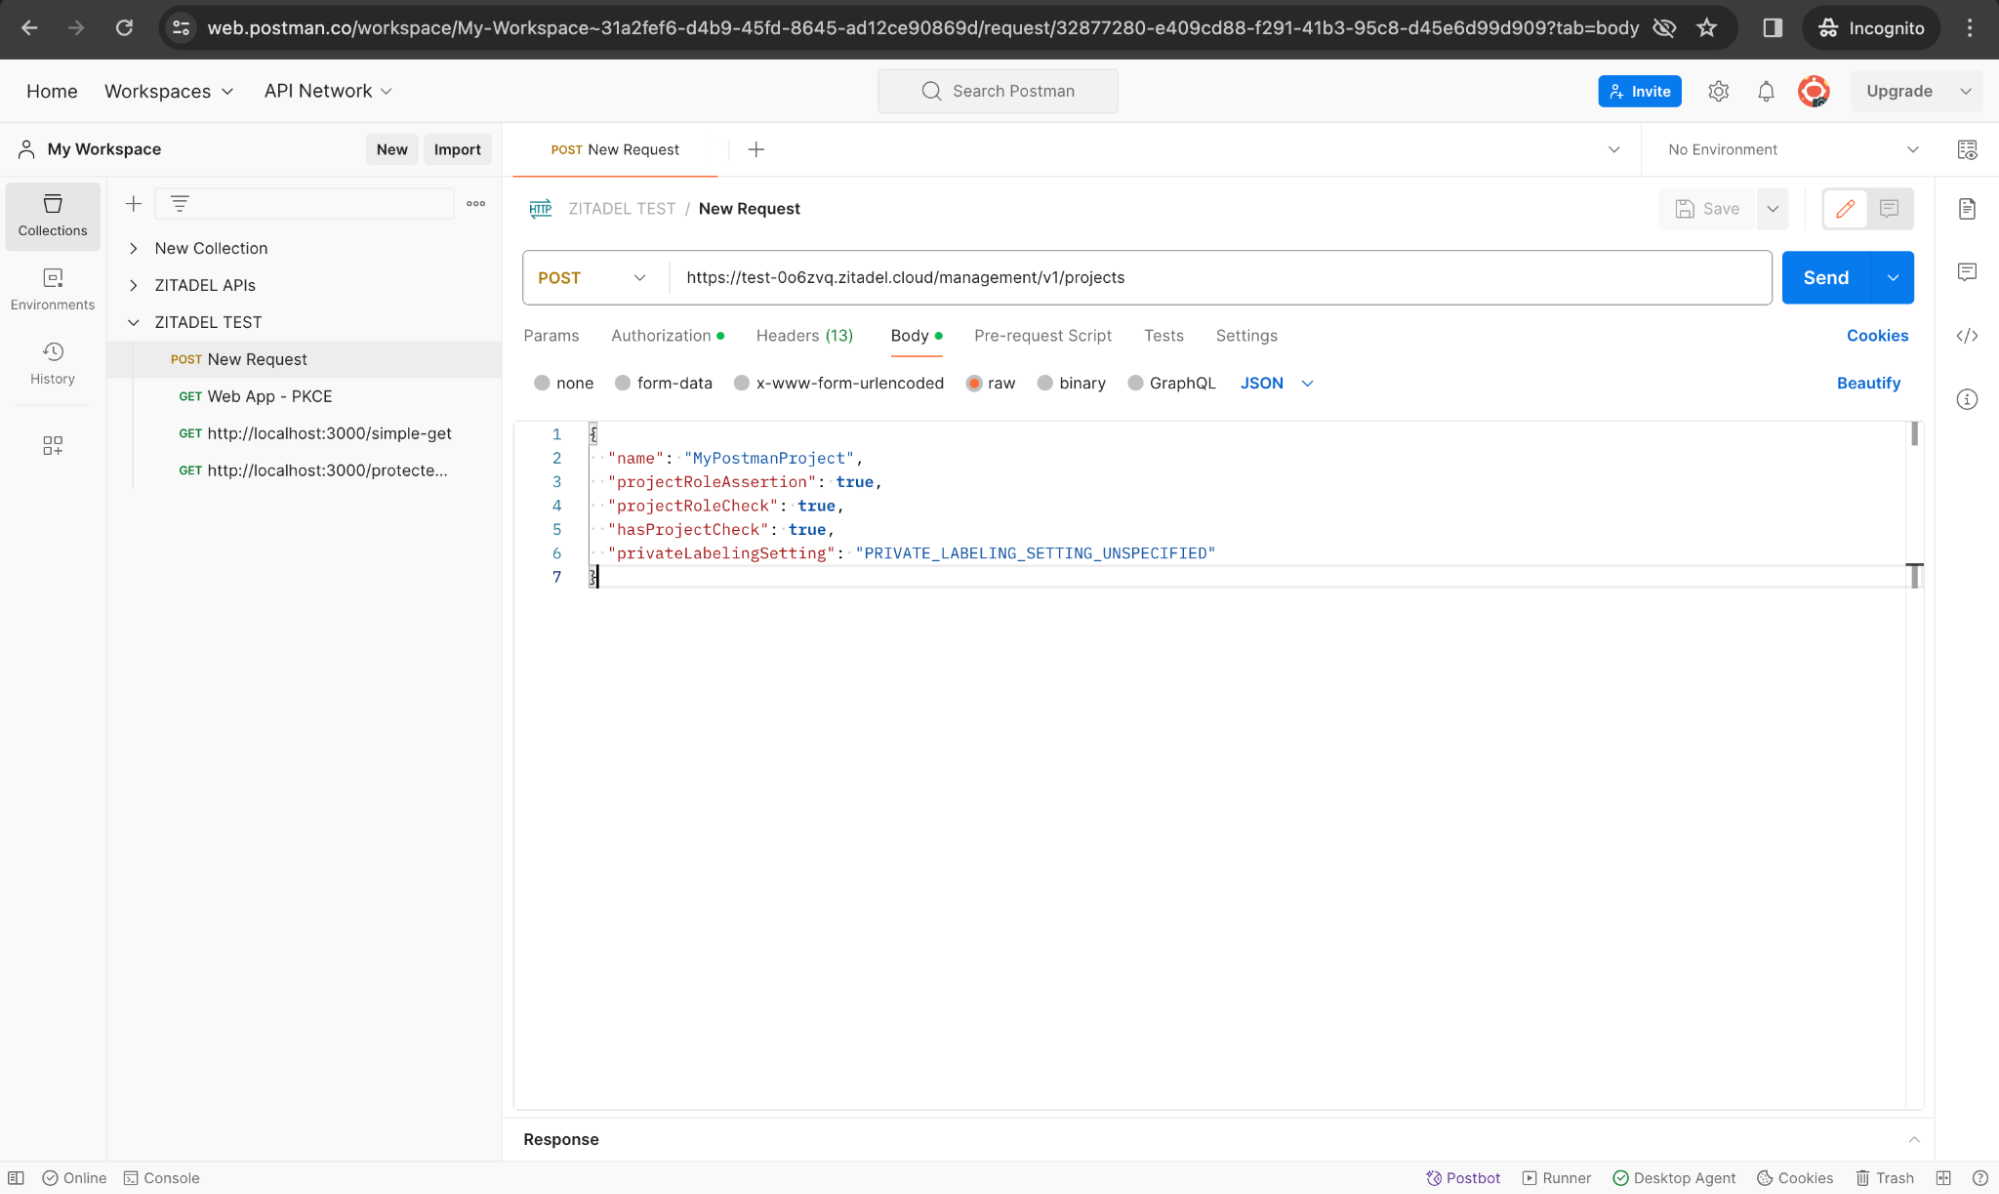
Go to the Body tab and add the following:
{
  "name": "MyPostmanProject",
  "projectRoleAssertion": true,
  "projectRoleCheck": true,
  "hasProjectCheck": true,
  "privateLabelingSetting": "PRIVATE_LABELING_SETTING_UNSPECIFIED"
}
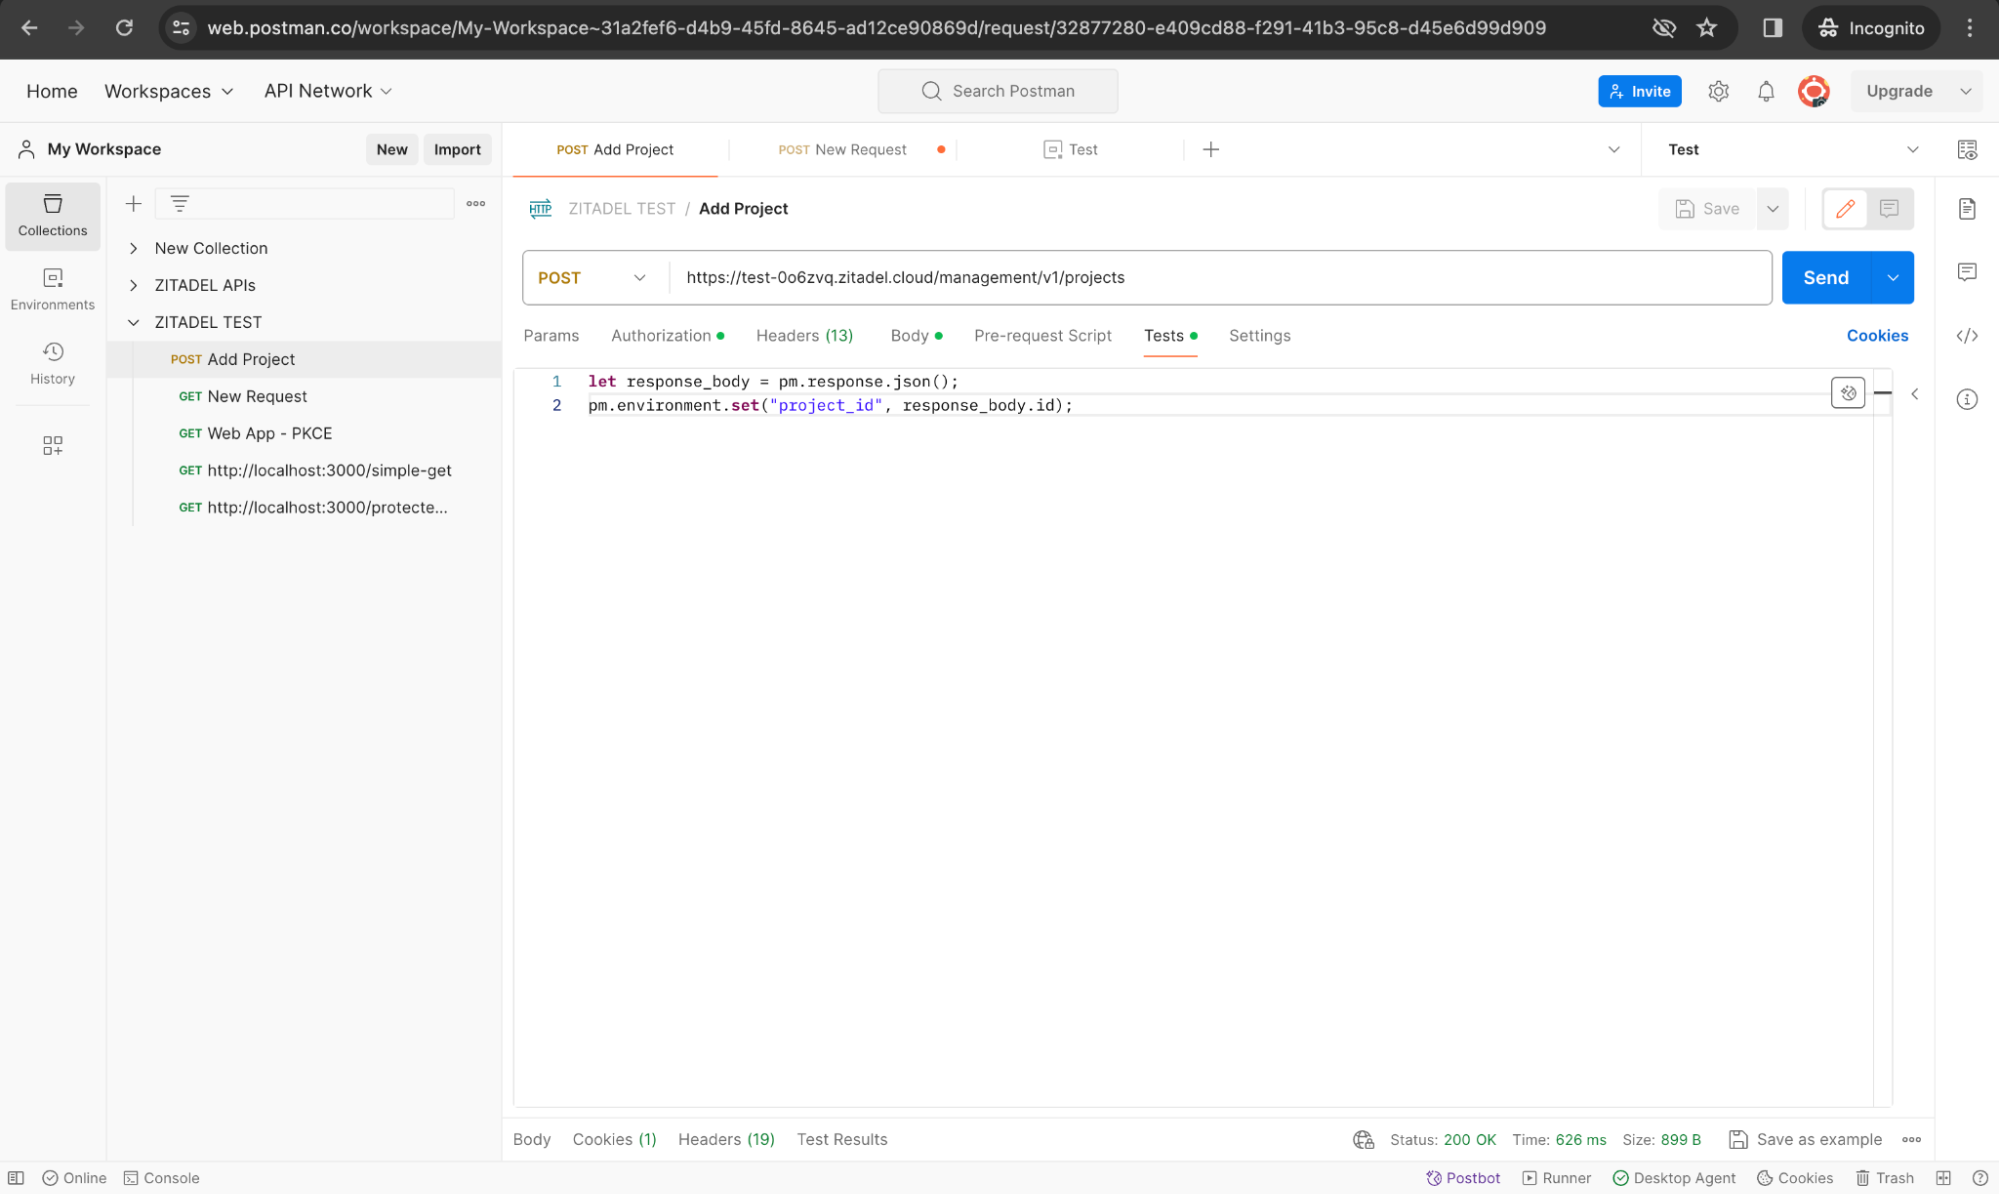
Also in the Tests tab, set an environment variable to capture the Project Id (when it is returned) as shown below:
let response_body = pm.response.json();
pm.environment.set("project_id", response_body.id);
Now send the request and you will get a response as shown below:
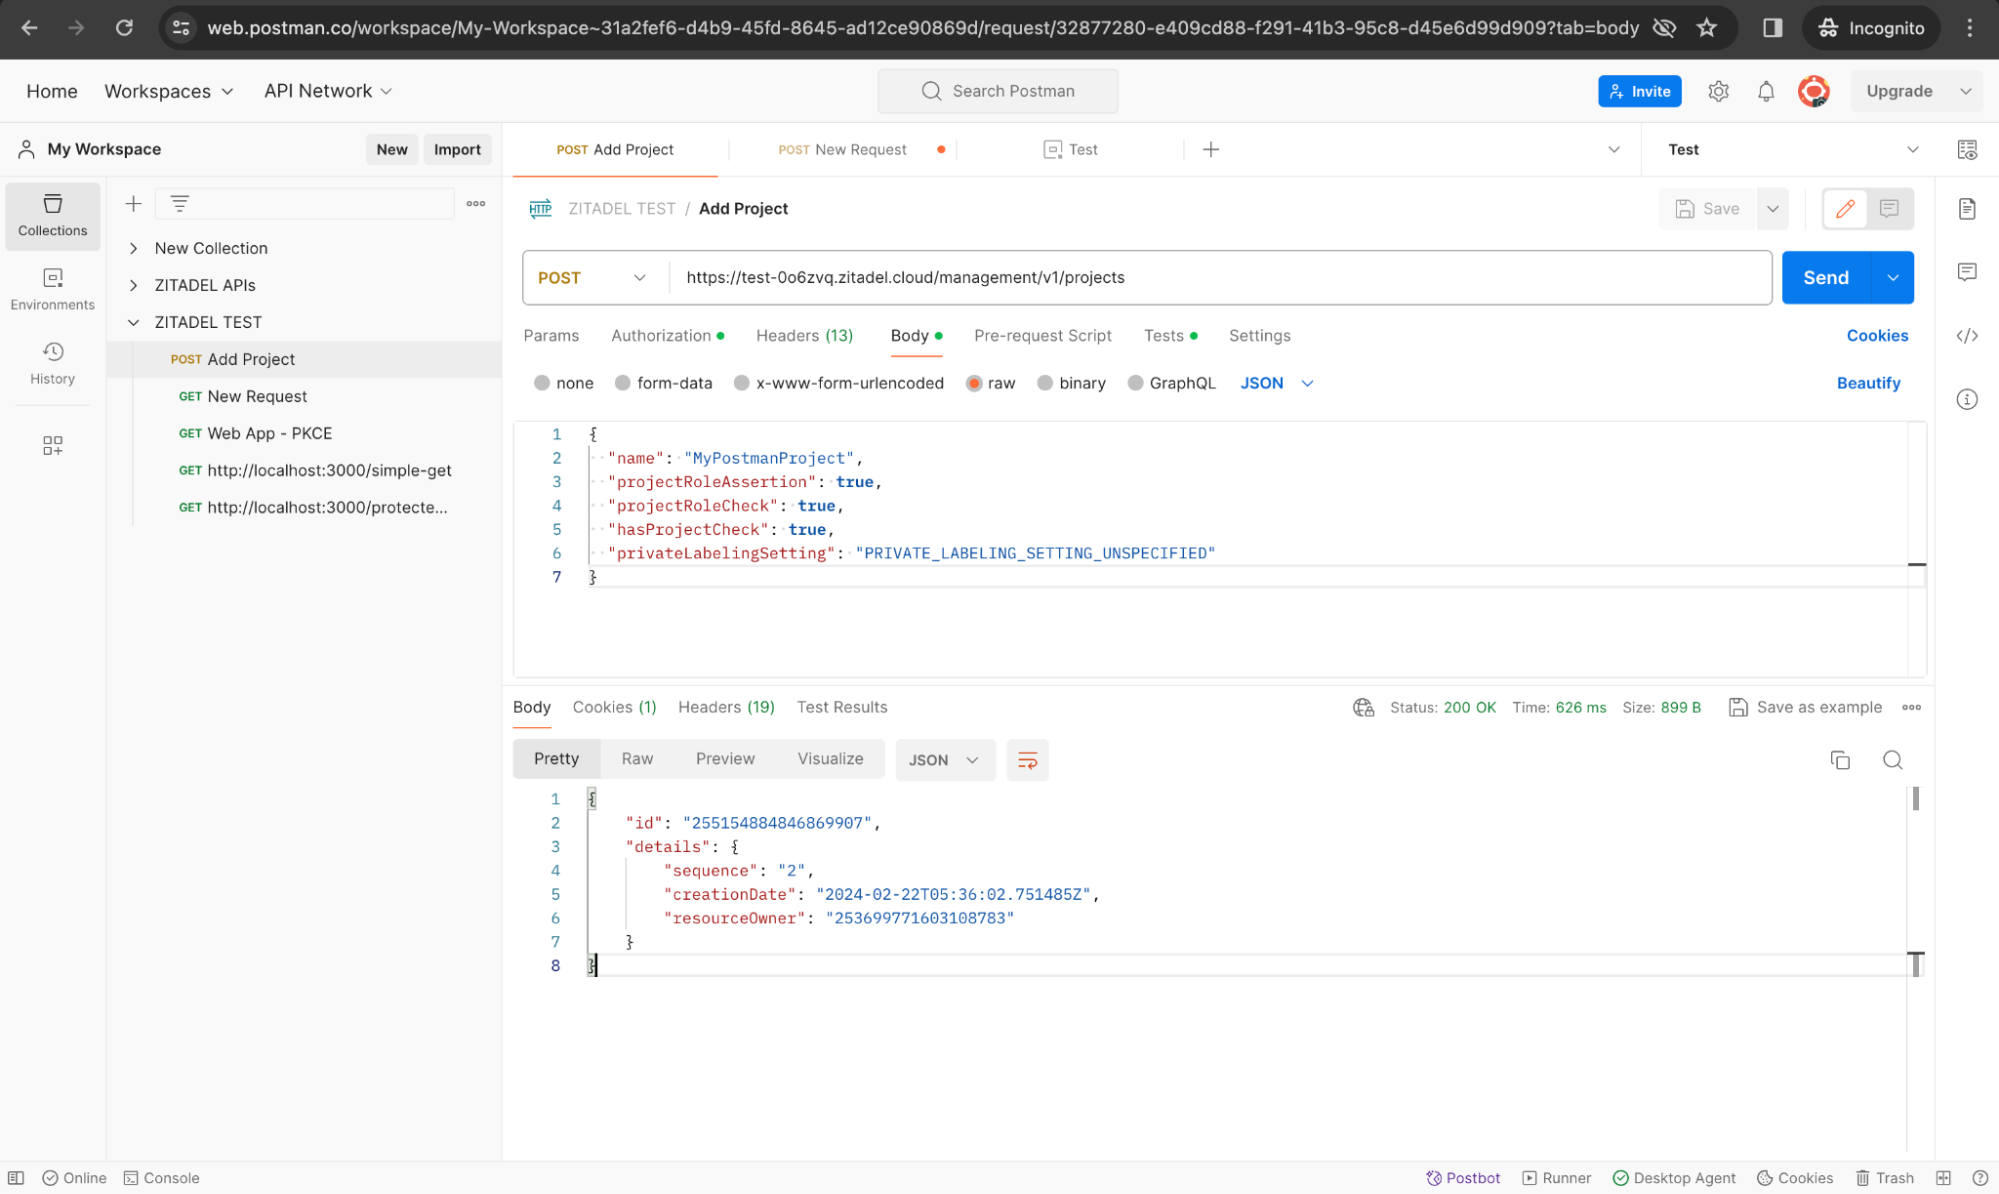
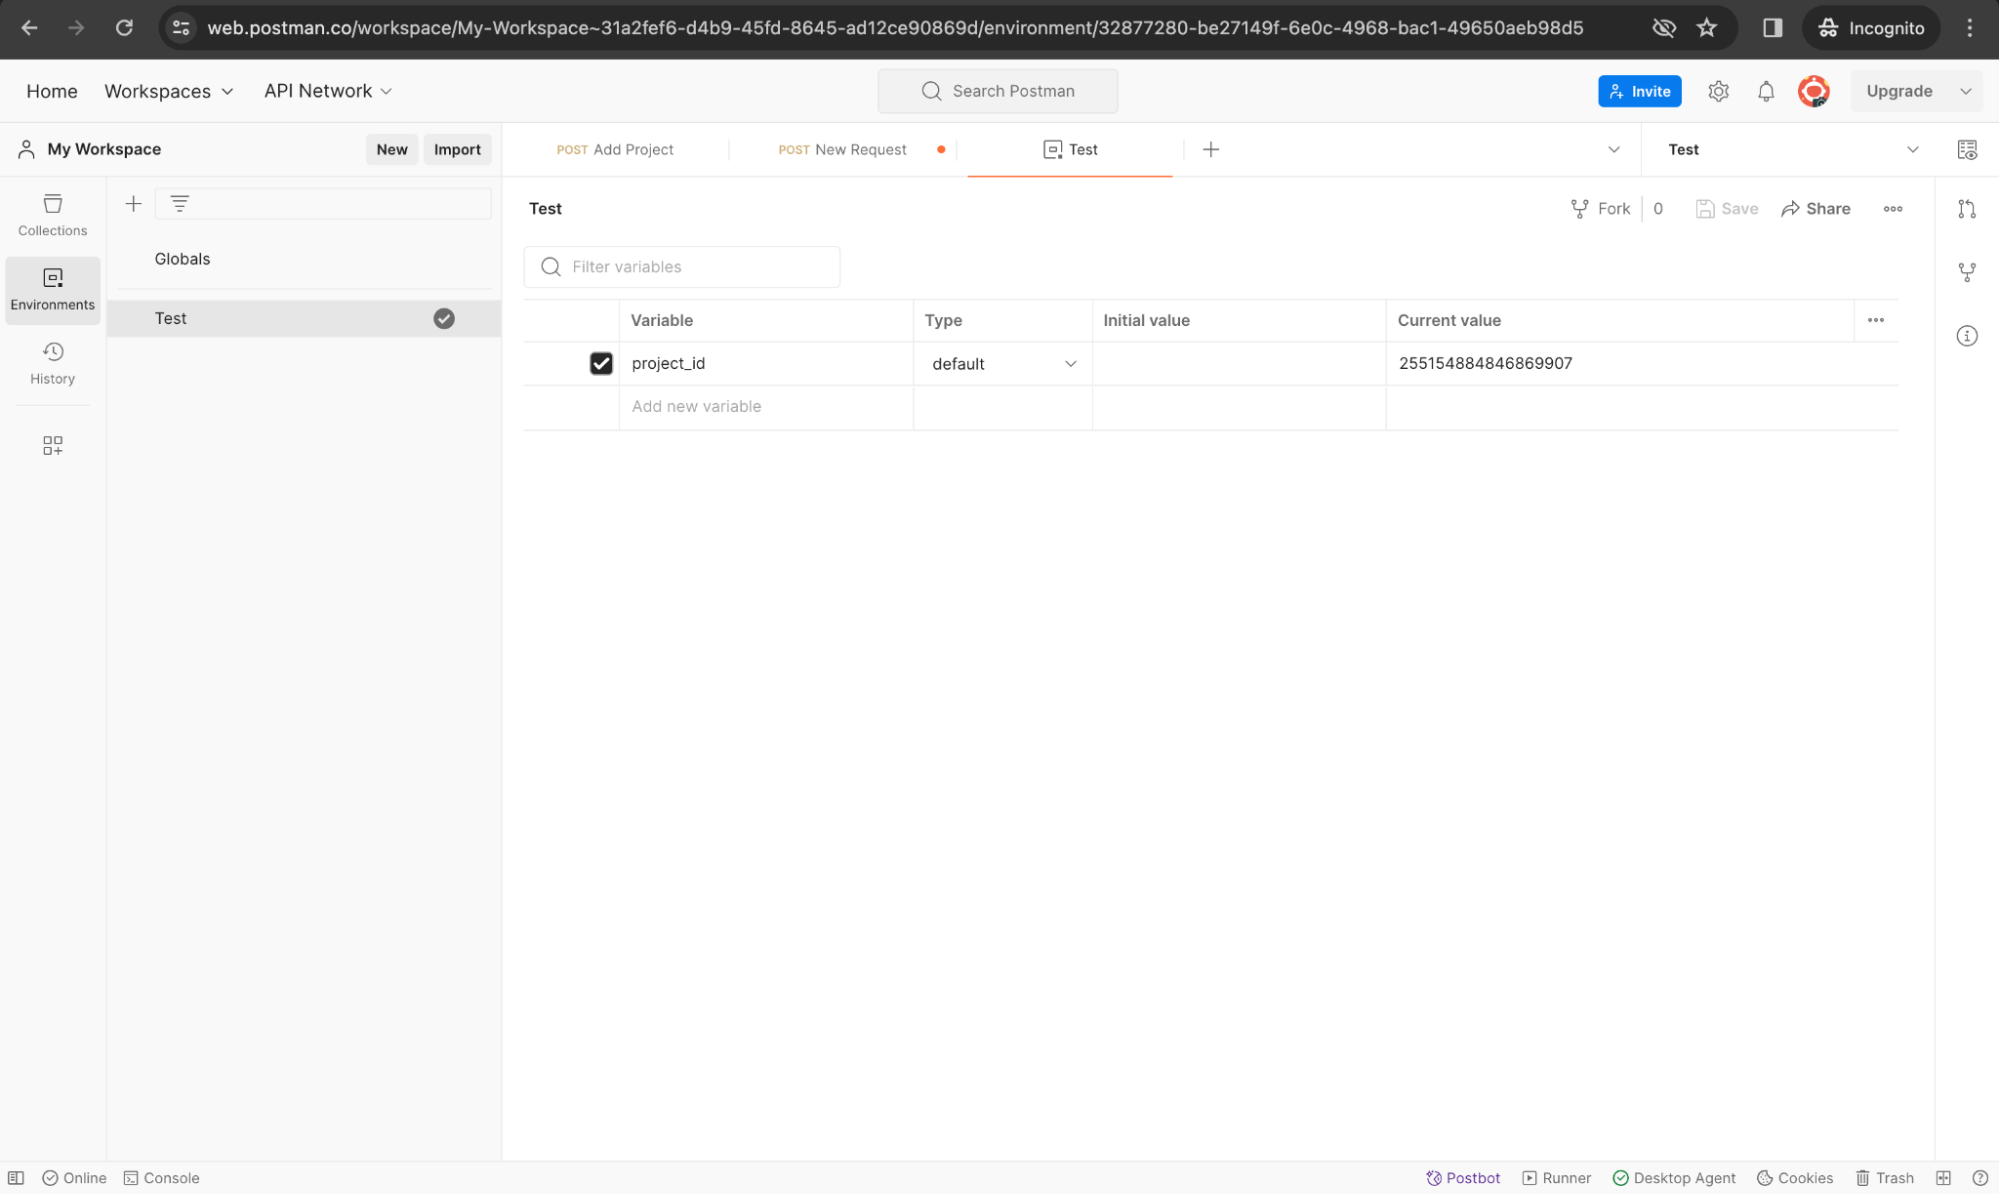
And you will also see that an environment variable called project_id is set after this call.
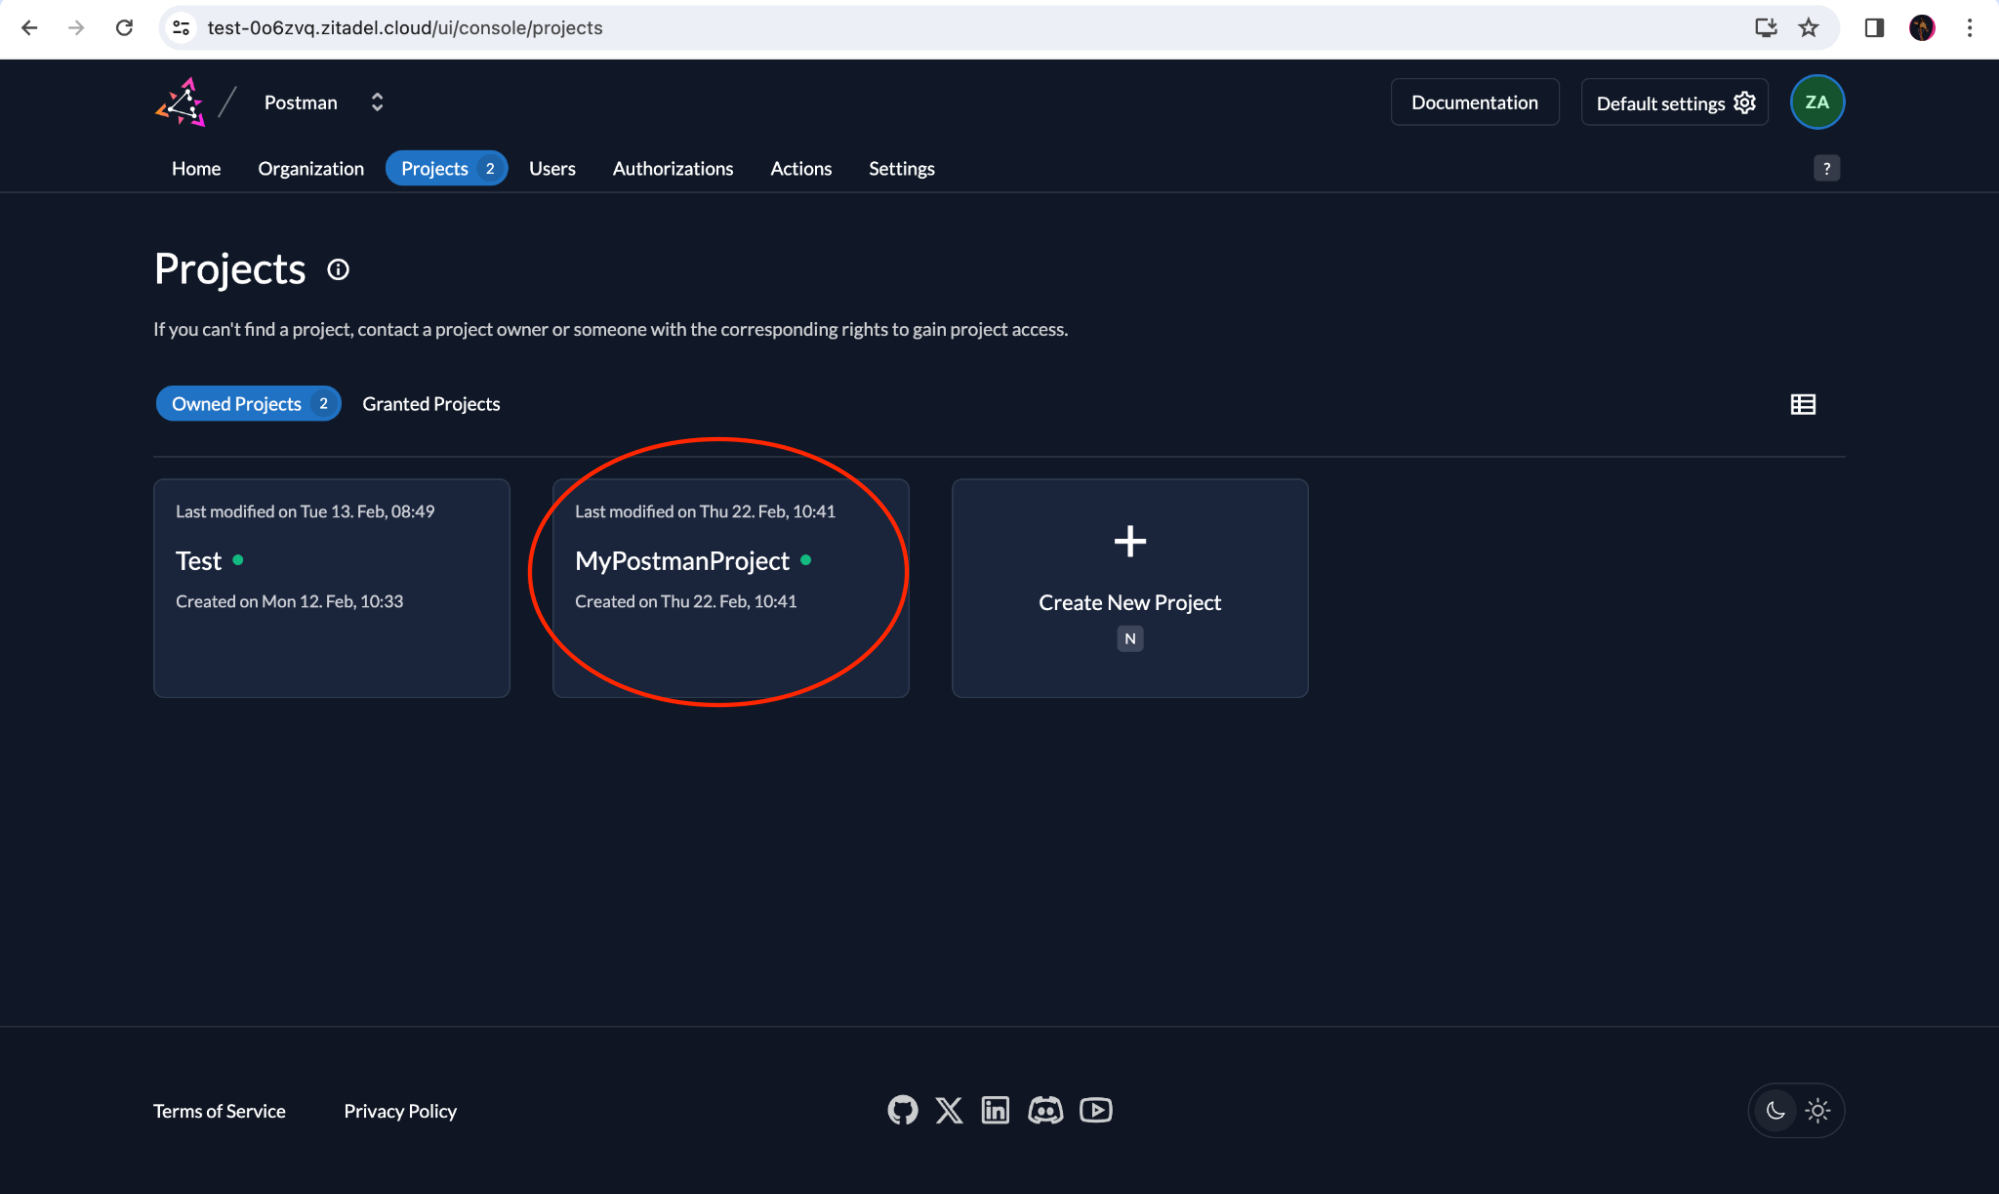
If you go to the ZITADEL console, you will also see that a new project was created.
Create an Application via the Management API
Now let’s add our OIDC web application. You can find more details about how to invoke this API here.
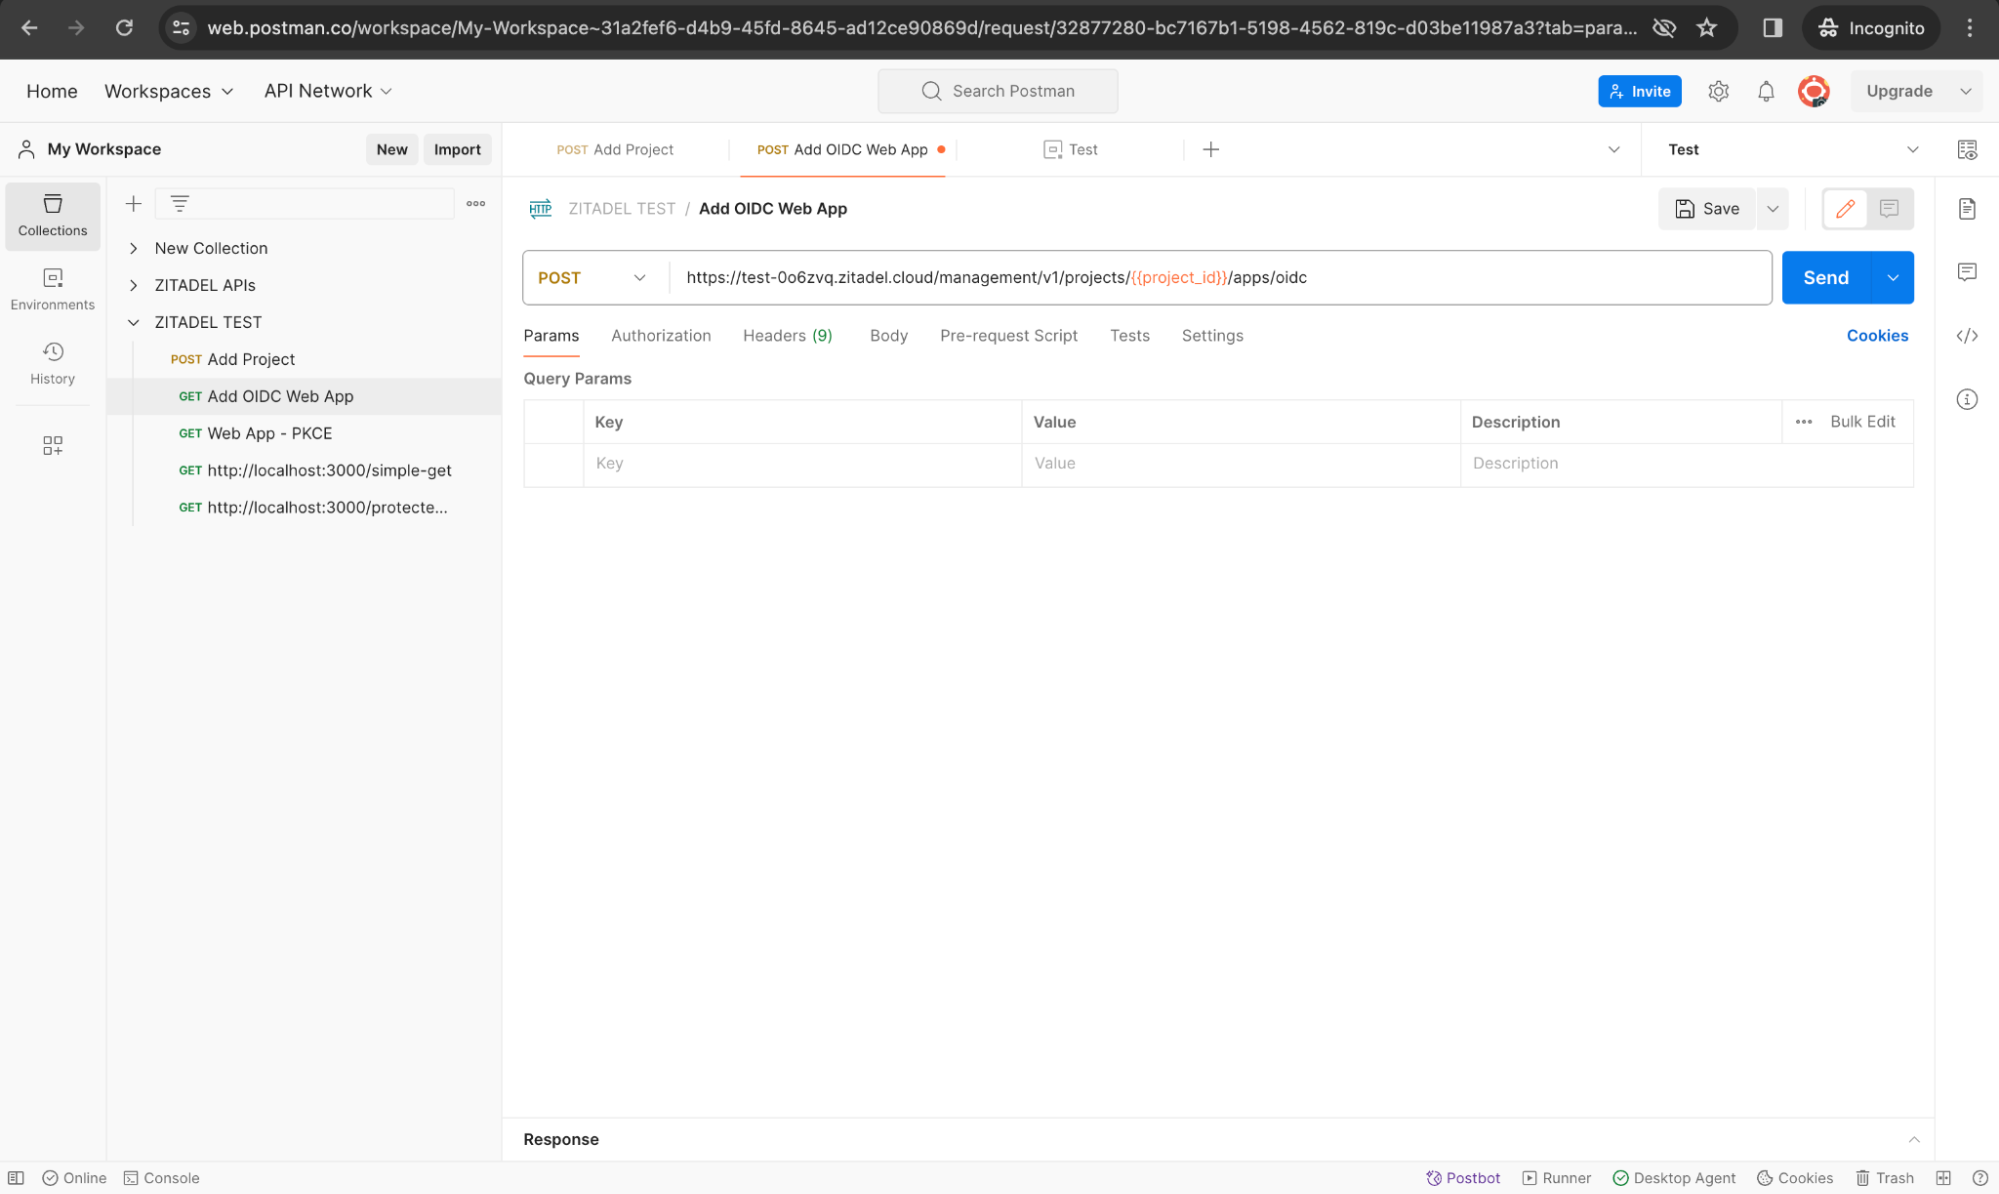
Create a new request (Add OIDC Web App). Use the project_id environment variable in the request URL as shown below.
Add Headers.
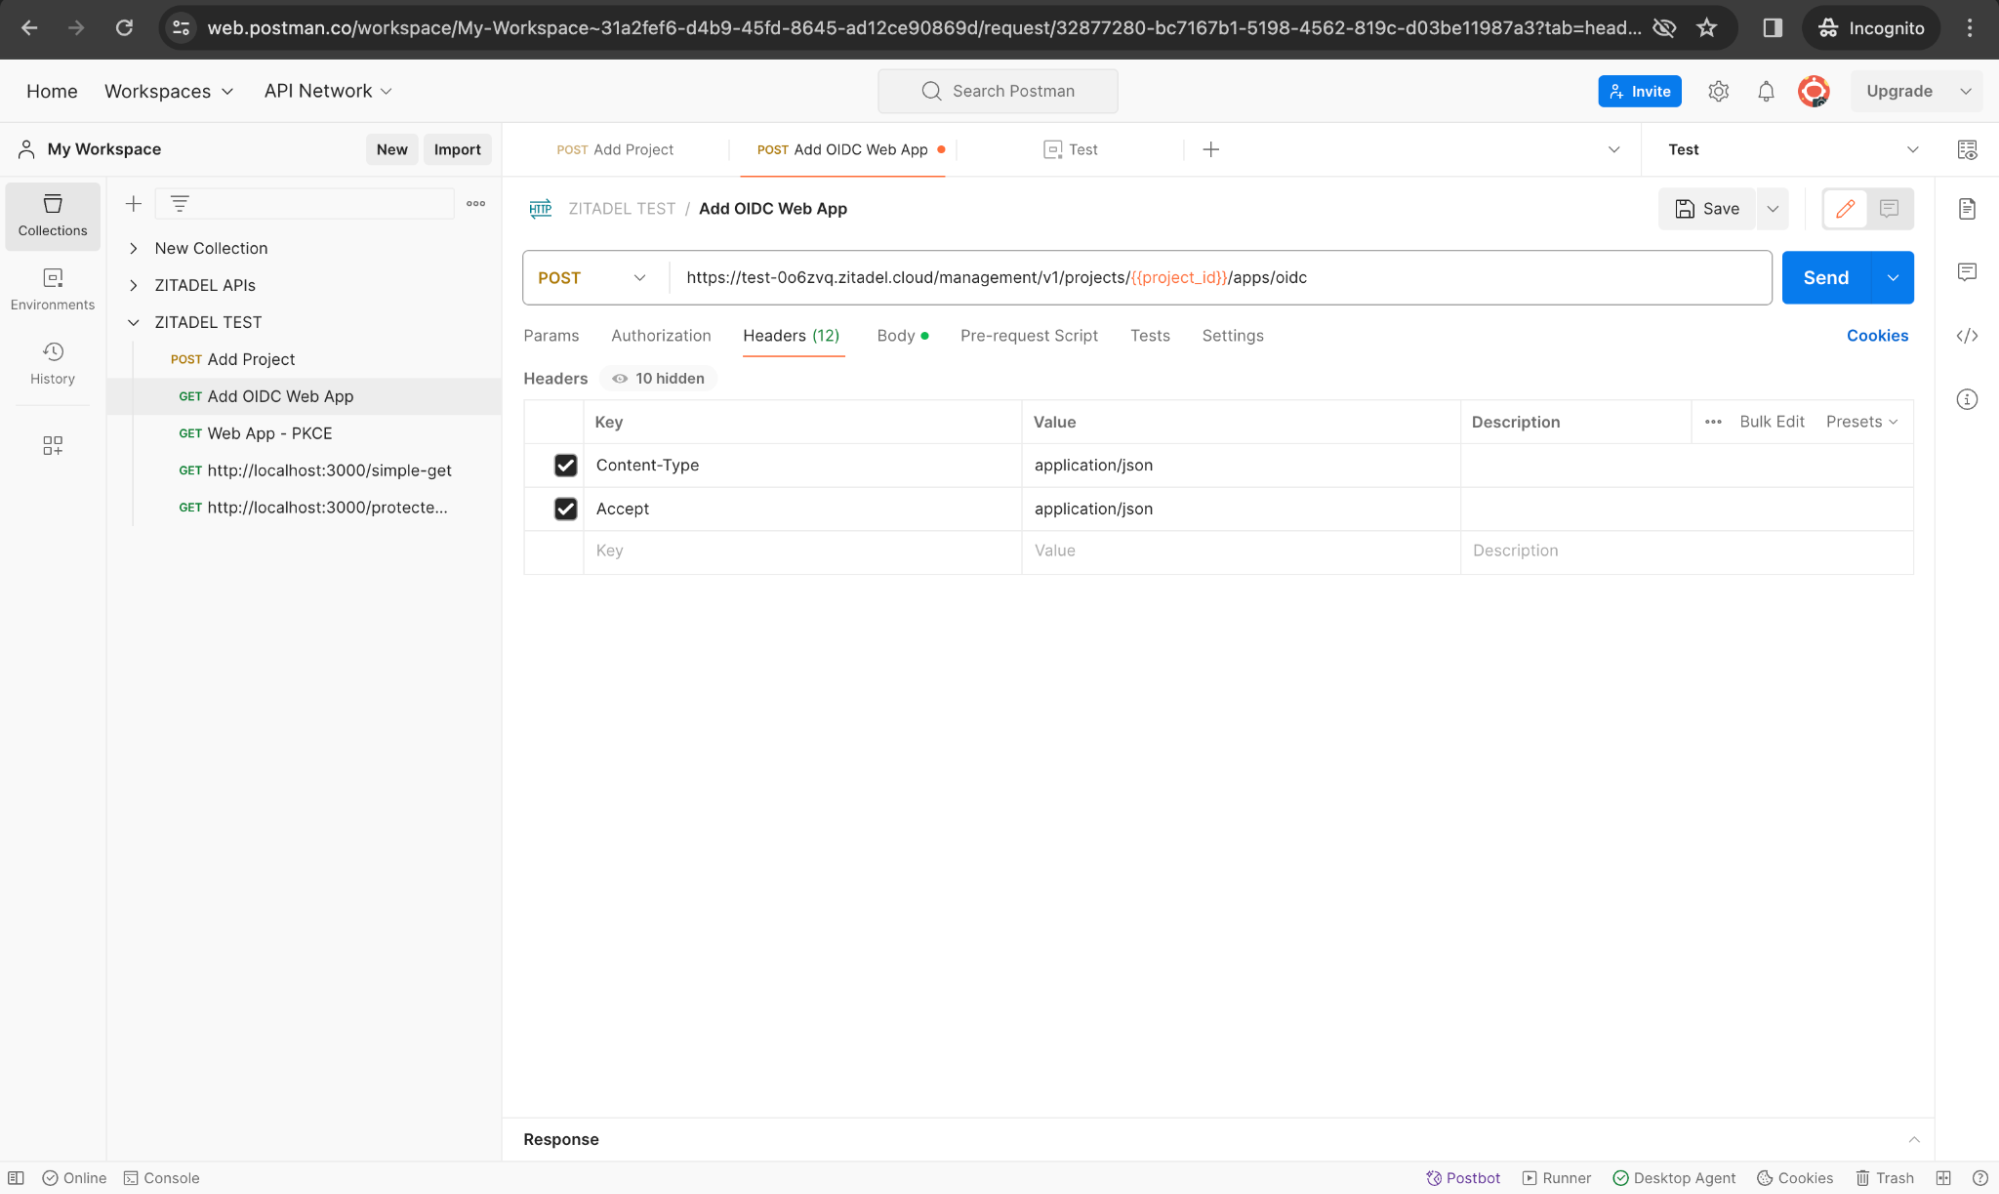
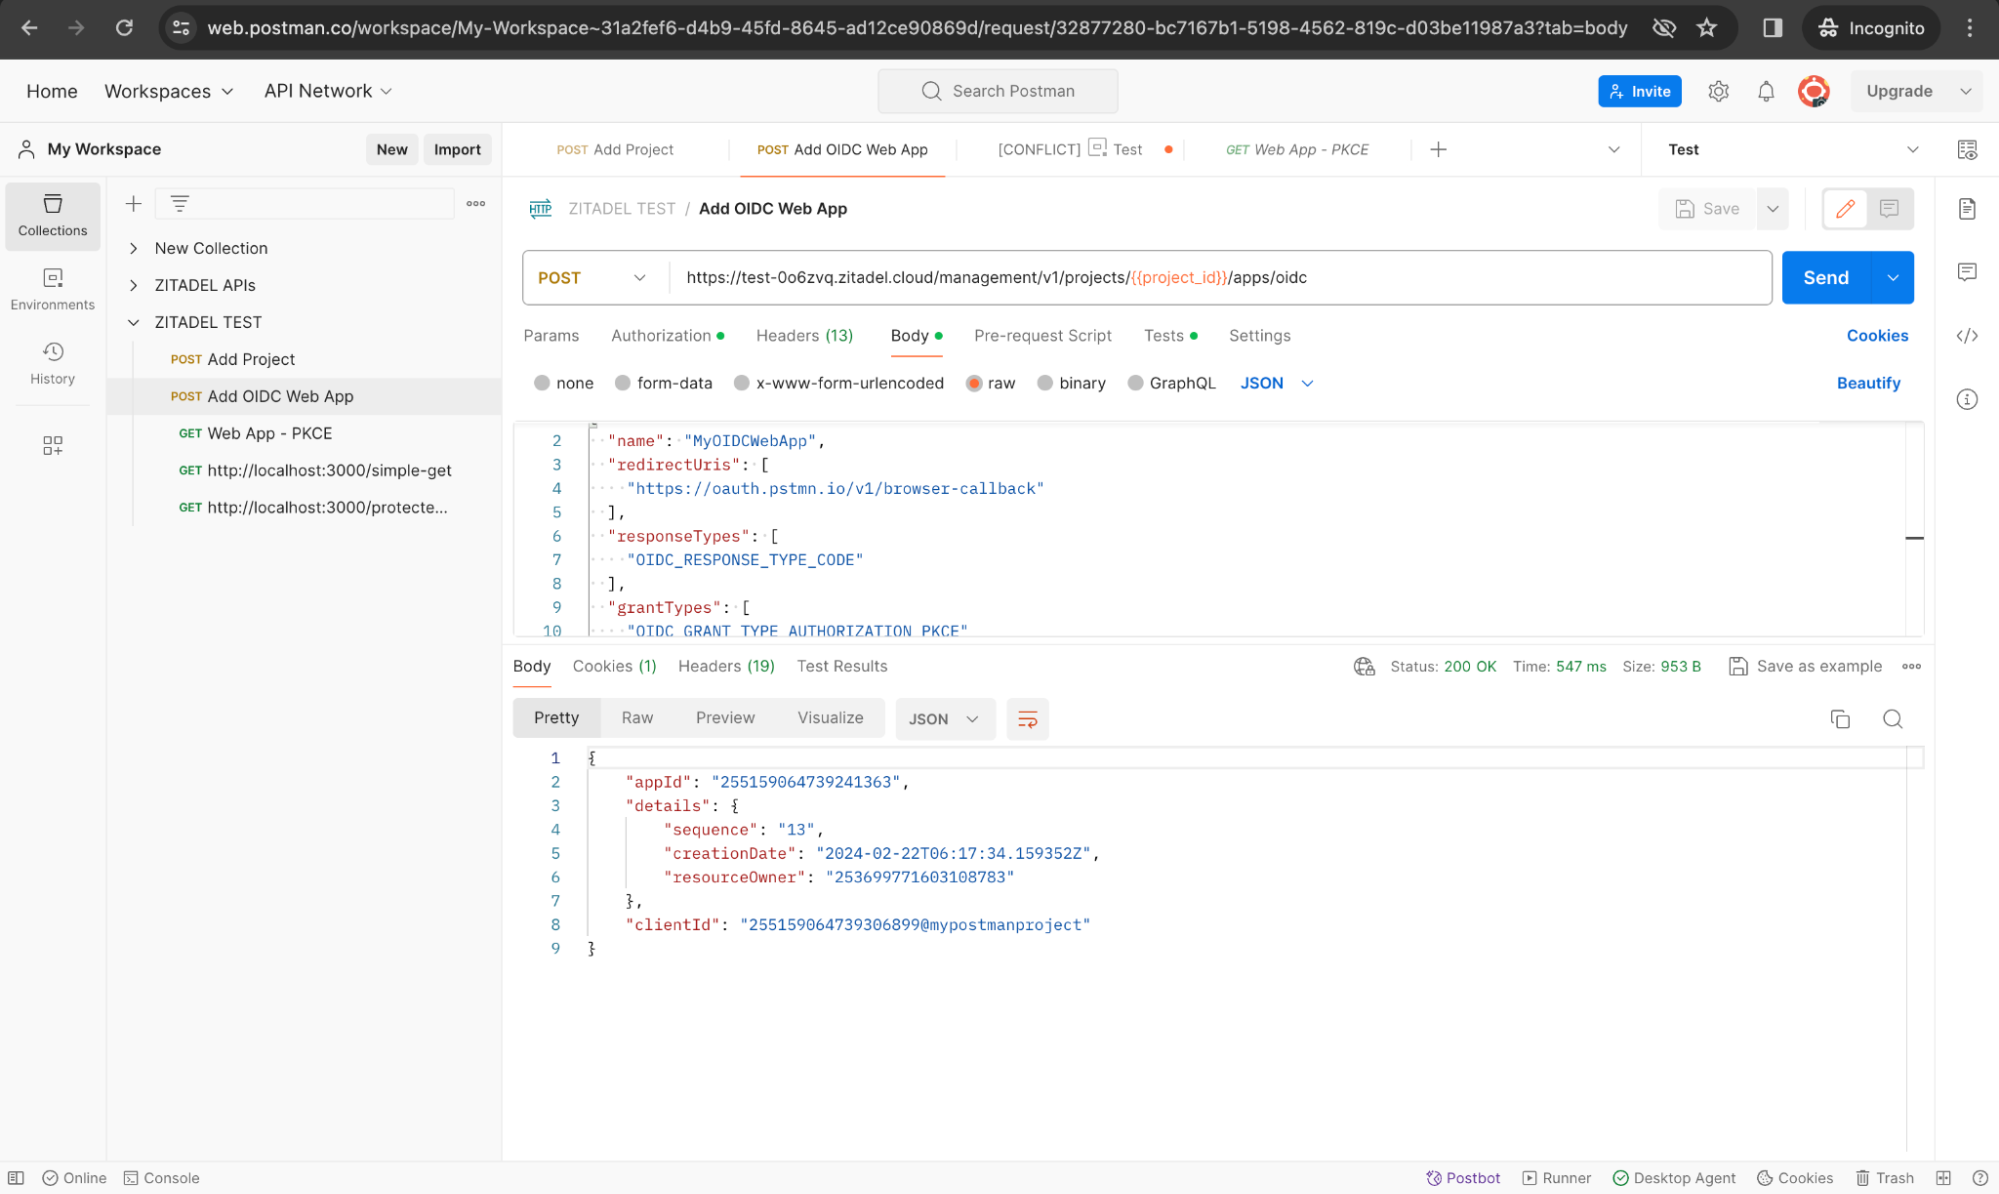
Add the body as follows:
{
 "name": "MyOIDCWebApp",
 "redirectUris": [
   "https://oauth.pstmn.io/v1/browser-callback"
 ],
 "responseTypes": [
   "OIDC_RESPONSE_TYPE_CODE"
 ],
 "grantTypes": [
   "OIDC_GRANT_TYPE_AUTHORIZATION_CODE"
 ],
 "appType": "OIDC_APP_TYPE_WEB",
 "authMethodType": "OIDC_AUTH_METHOD_TYPE_NONE",
 "version": "OIDC_VERSION_1_0",
 "devMode": true,
 "accessTokenType": "OIDC_TOKEN_TYPE_BEARER",
 "accessTokenRoleAssertion": true,
 "idTokenRoleAssertion": true,
 "idTokenUserinfoAssertion": true,
 "clockSkew": "1s",
 "additionalOrigins": [
   "scheme://localhost:8080"
 ],
 "skipNativeAppSuccessPage": true
}
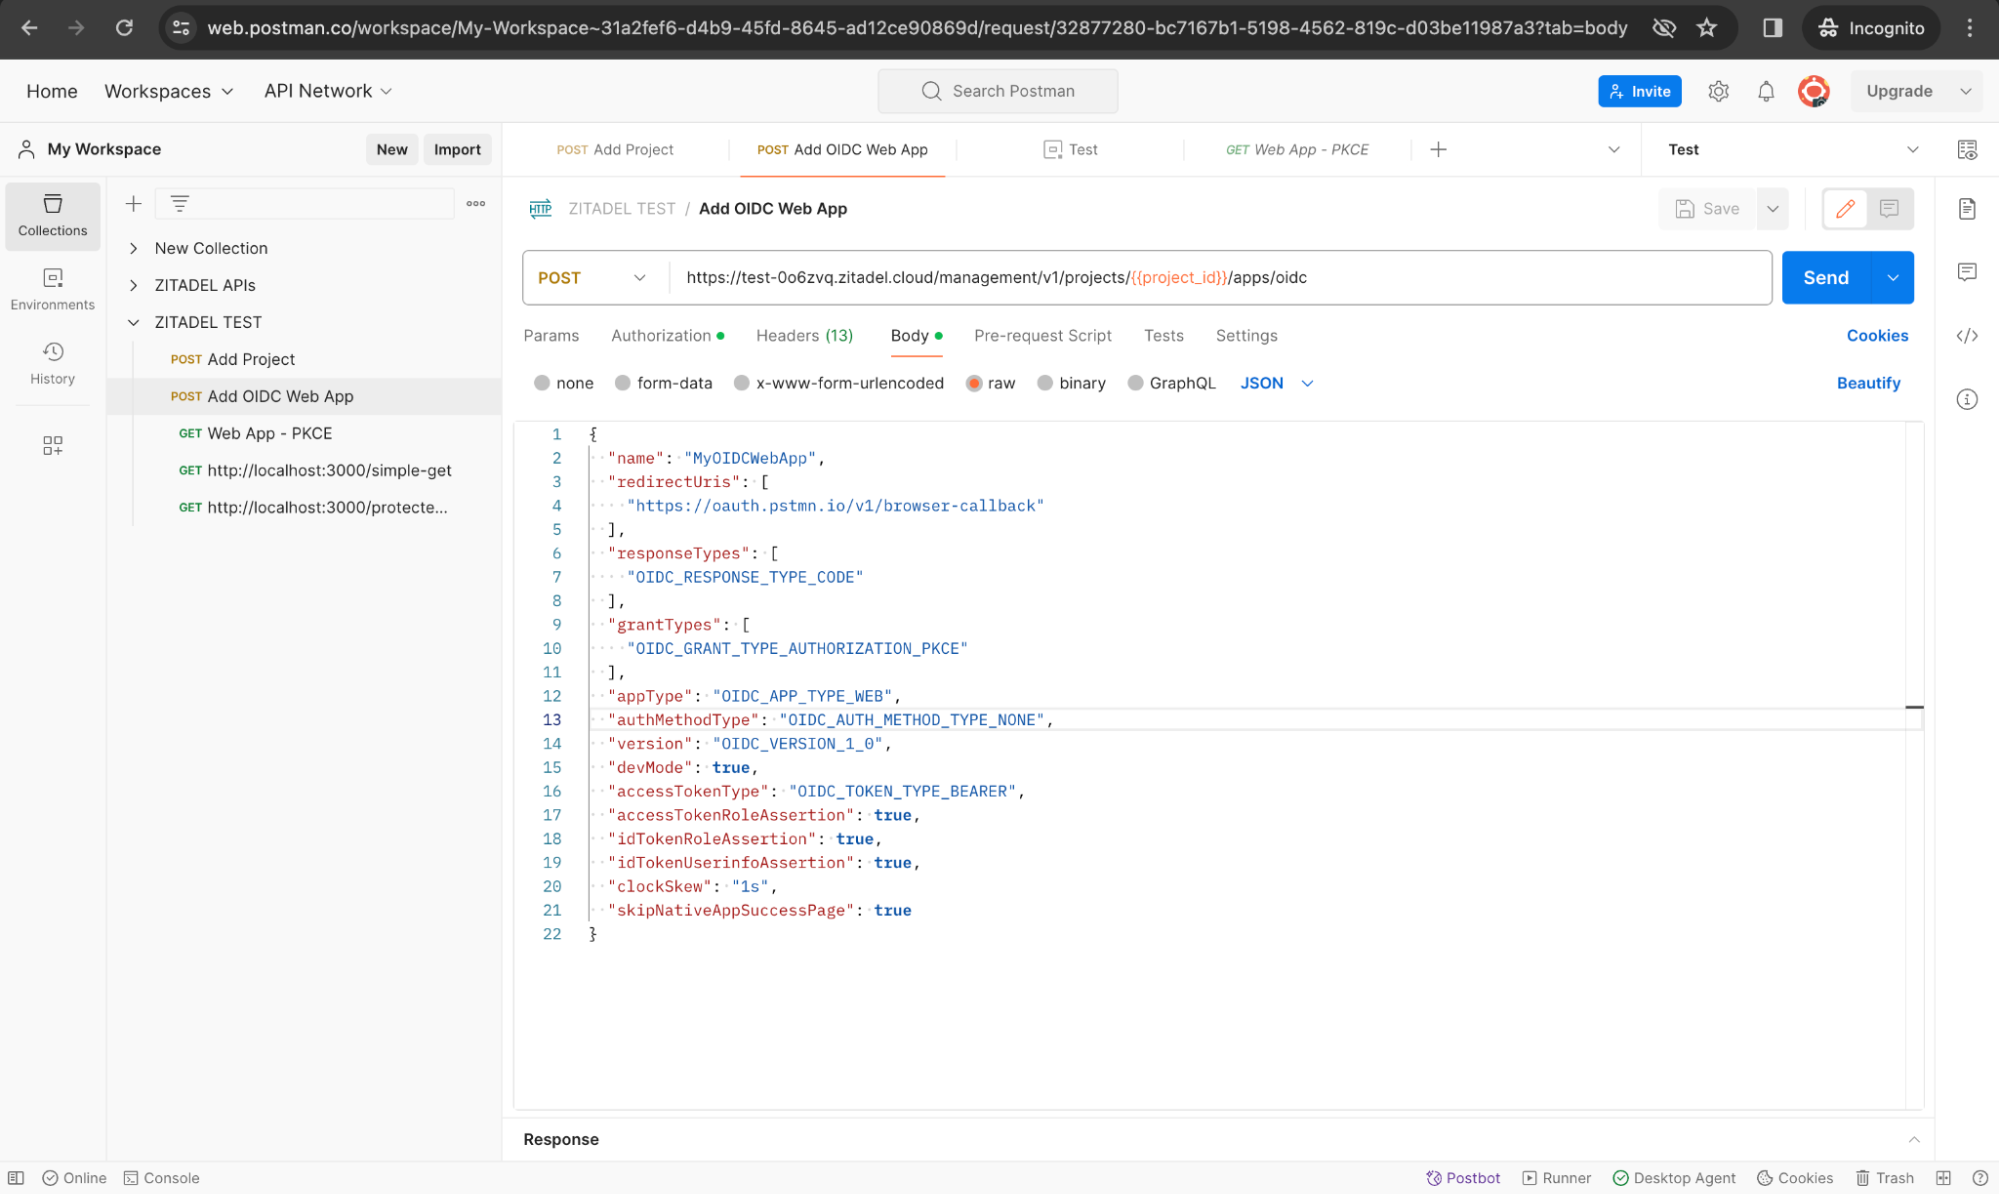
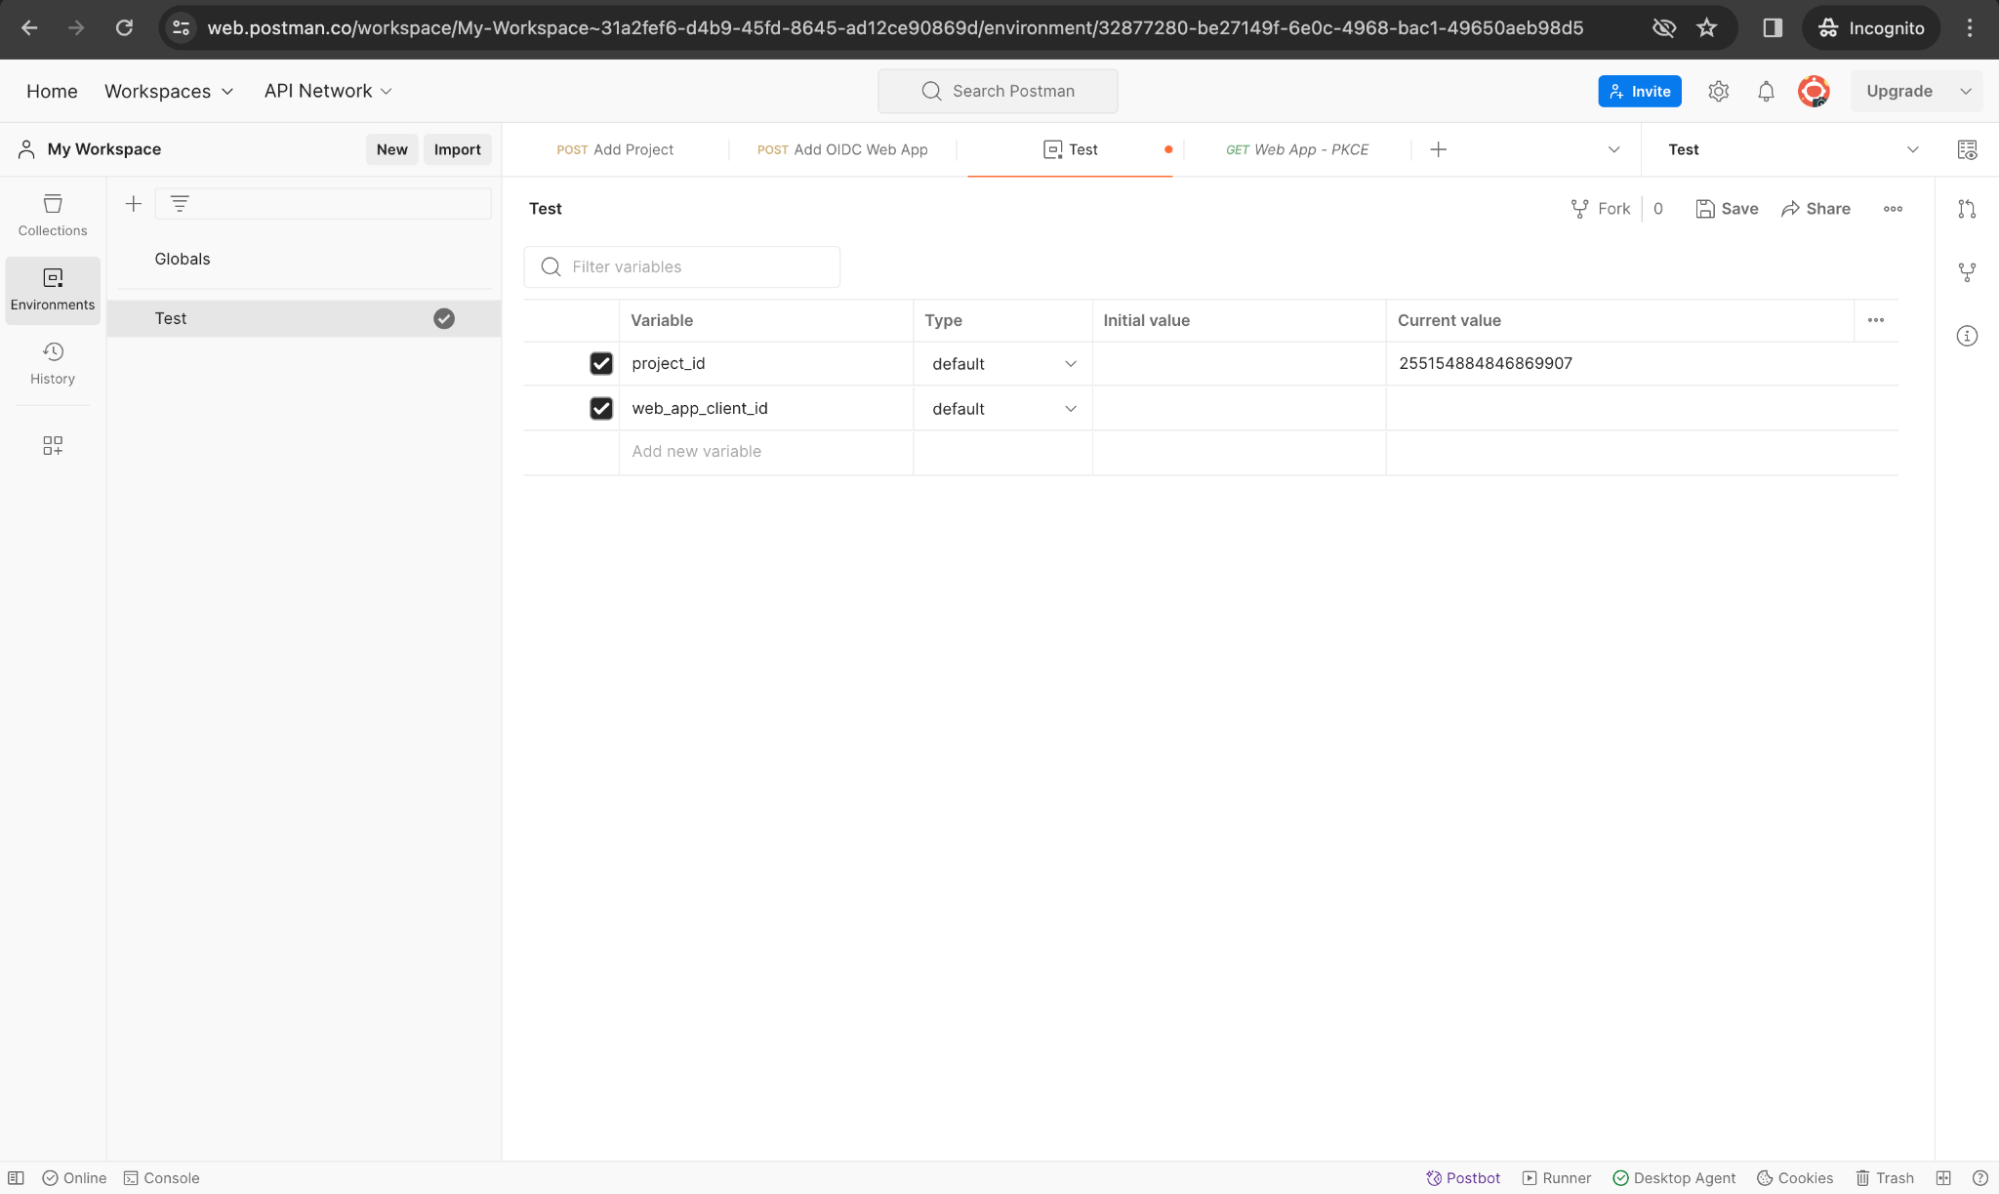
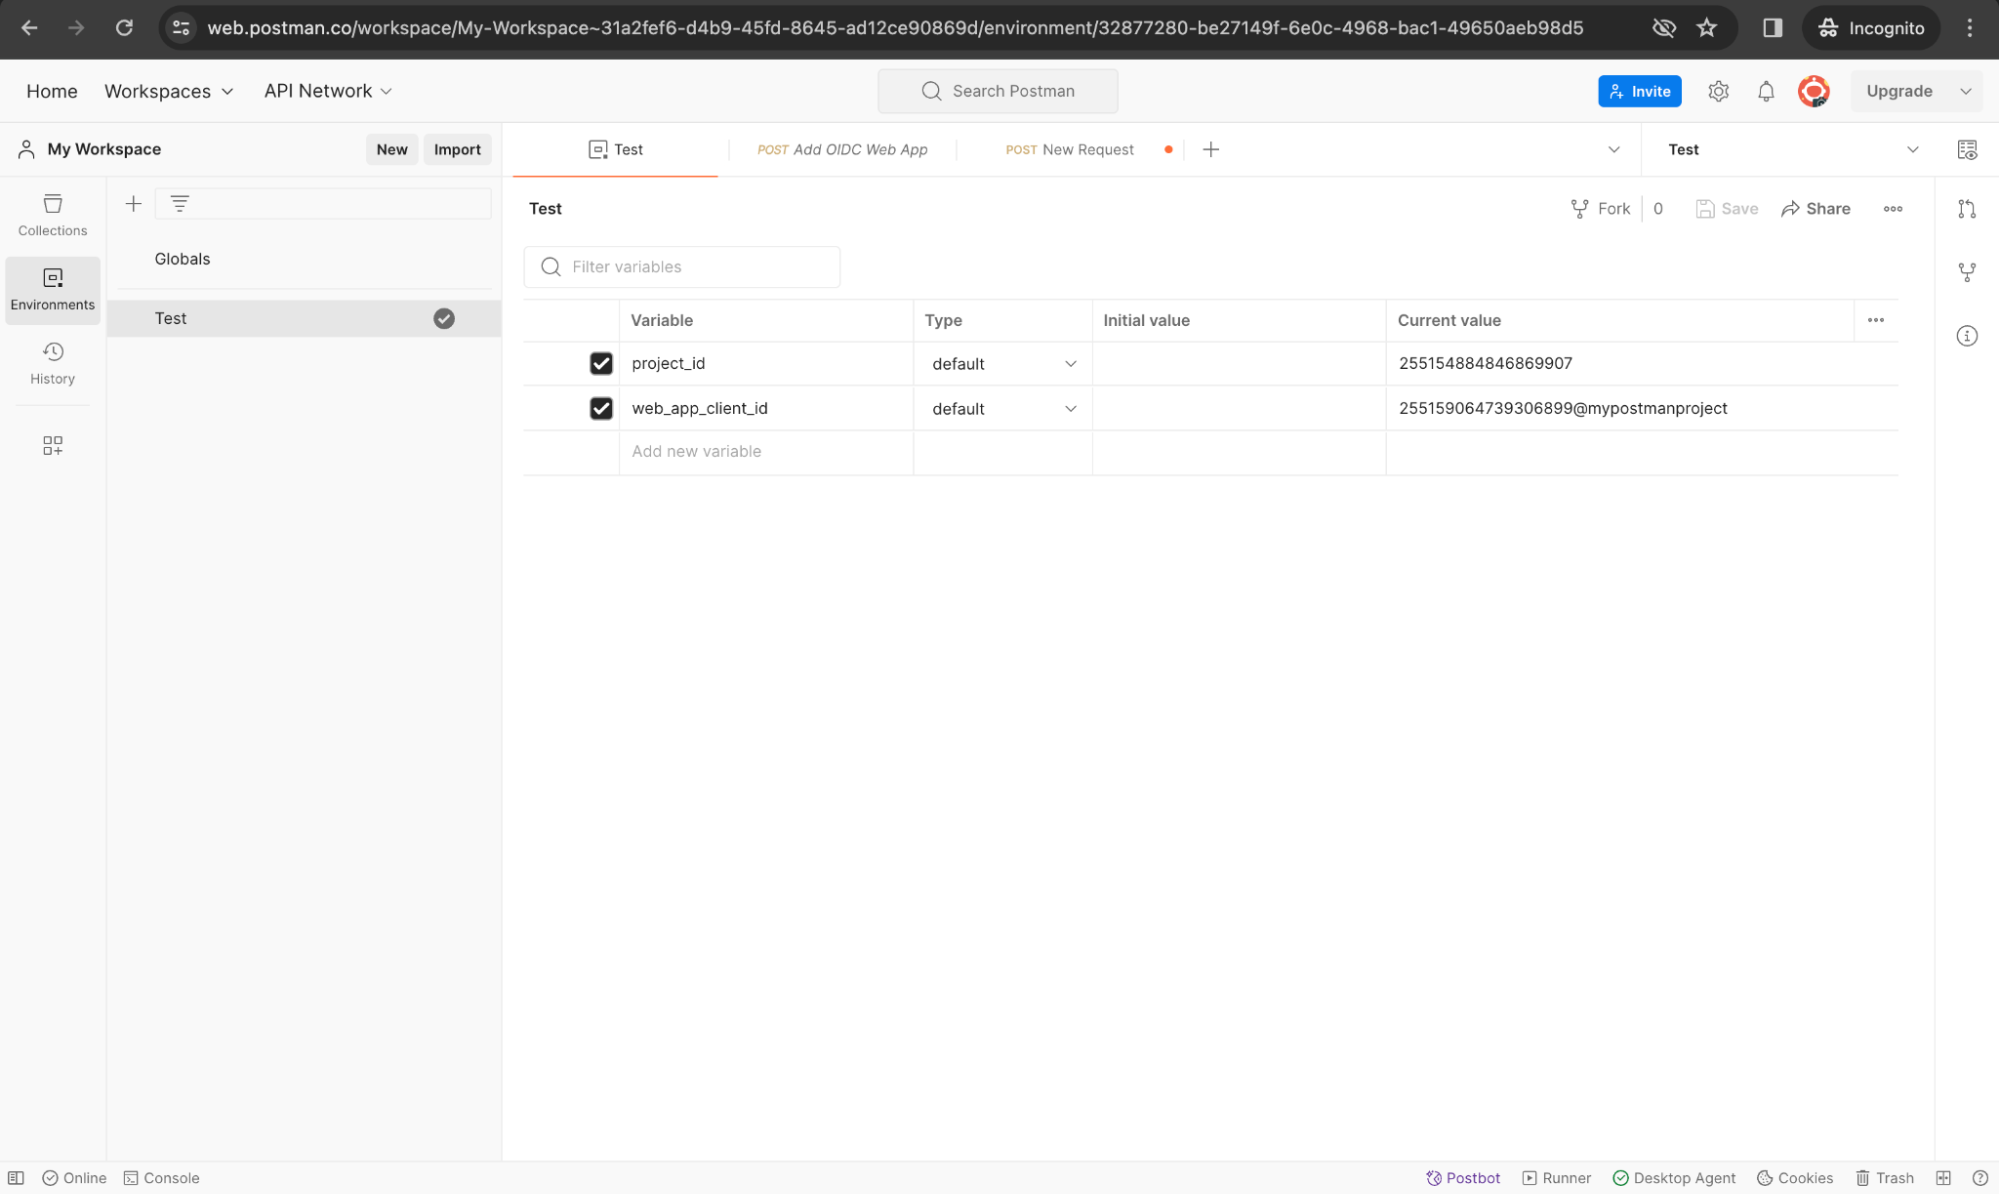
We will also need to store the Client ID to an environment variable, so set up an environment variable called web_app_client_id.
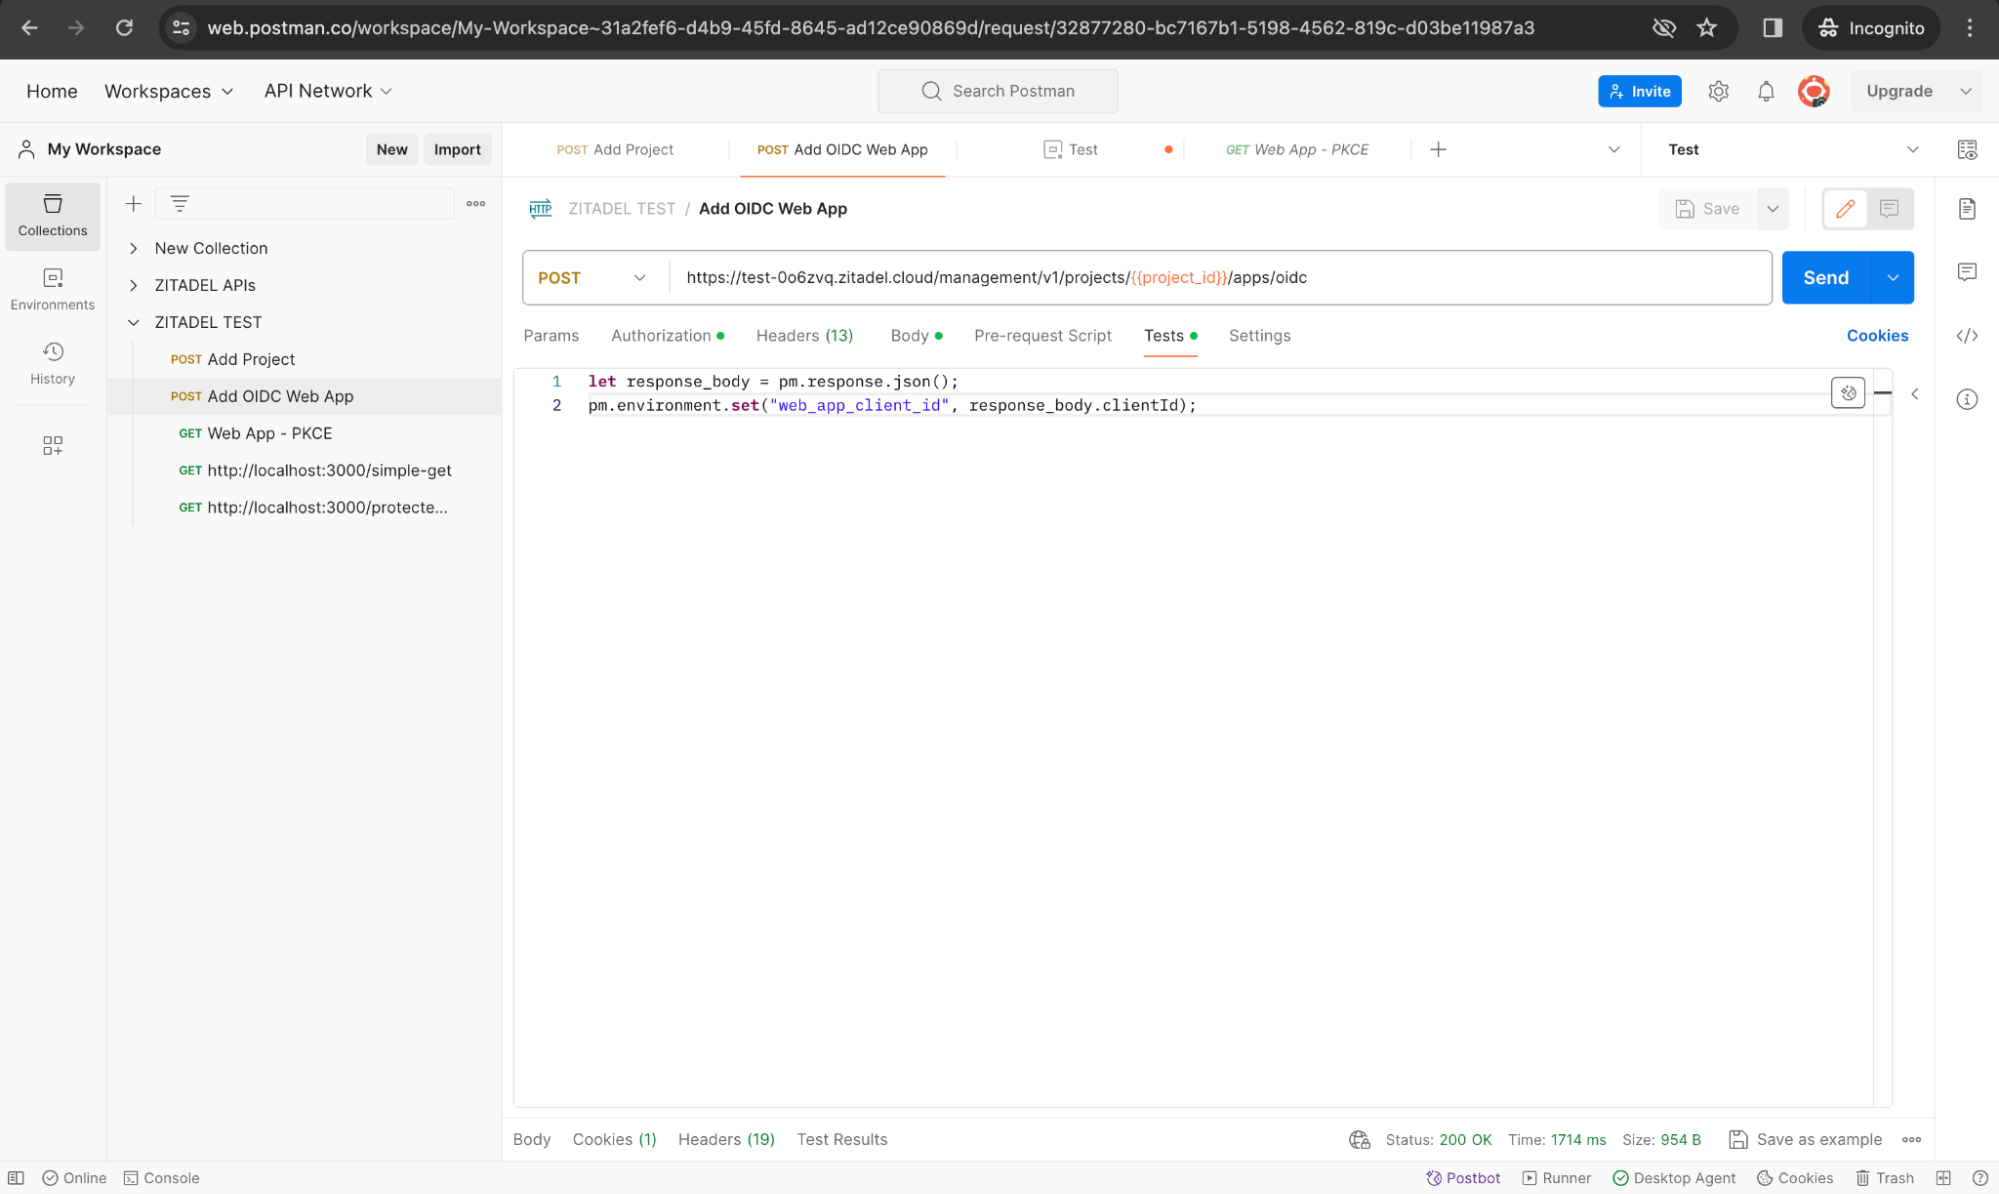
Add the script below to the Tests tab of the request.
let response_body = pm.response.json();
pm.environment.set("web_app_client_id", response_body.clientId);
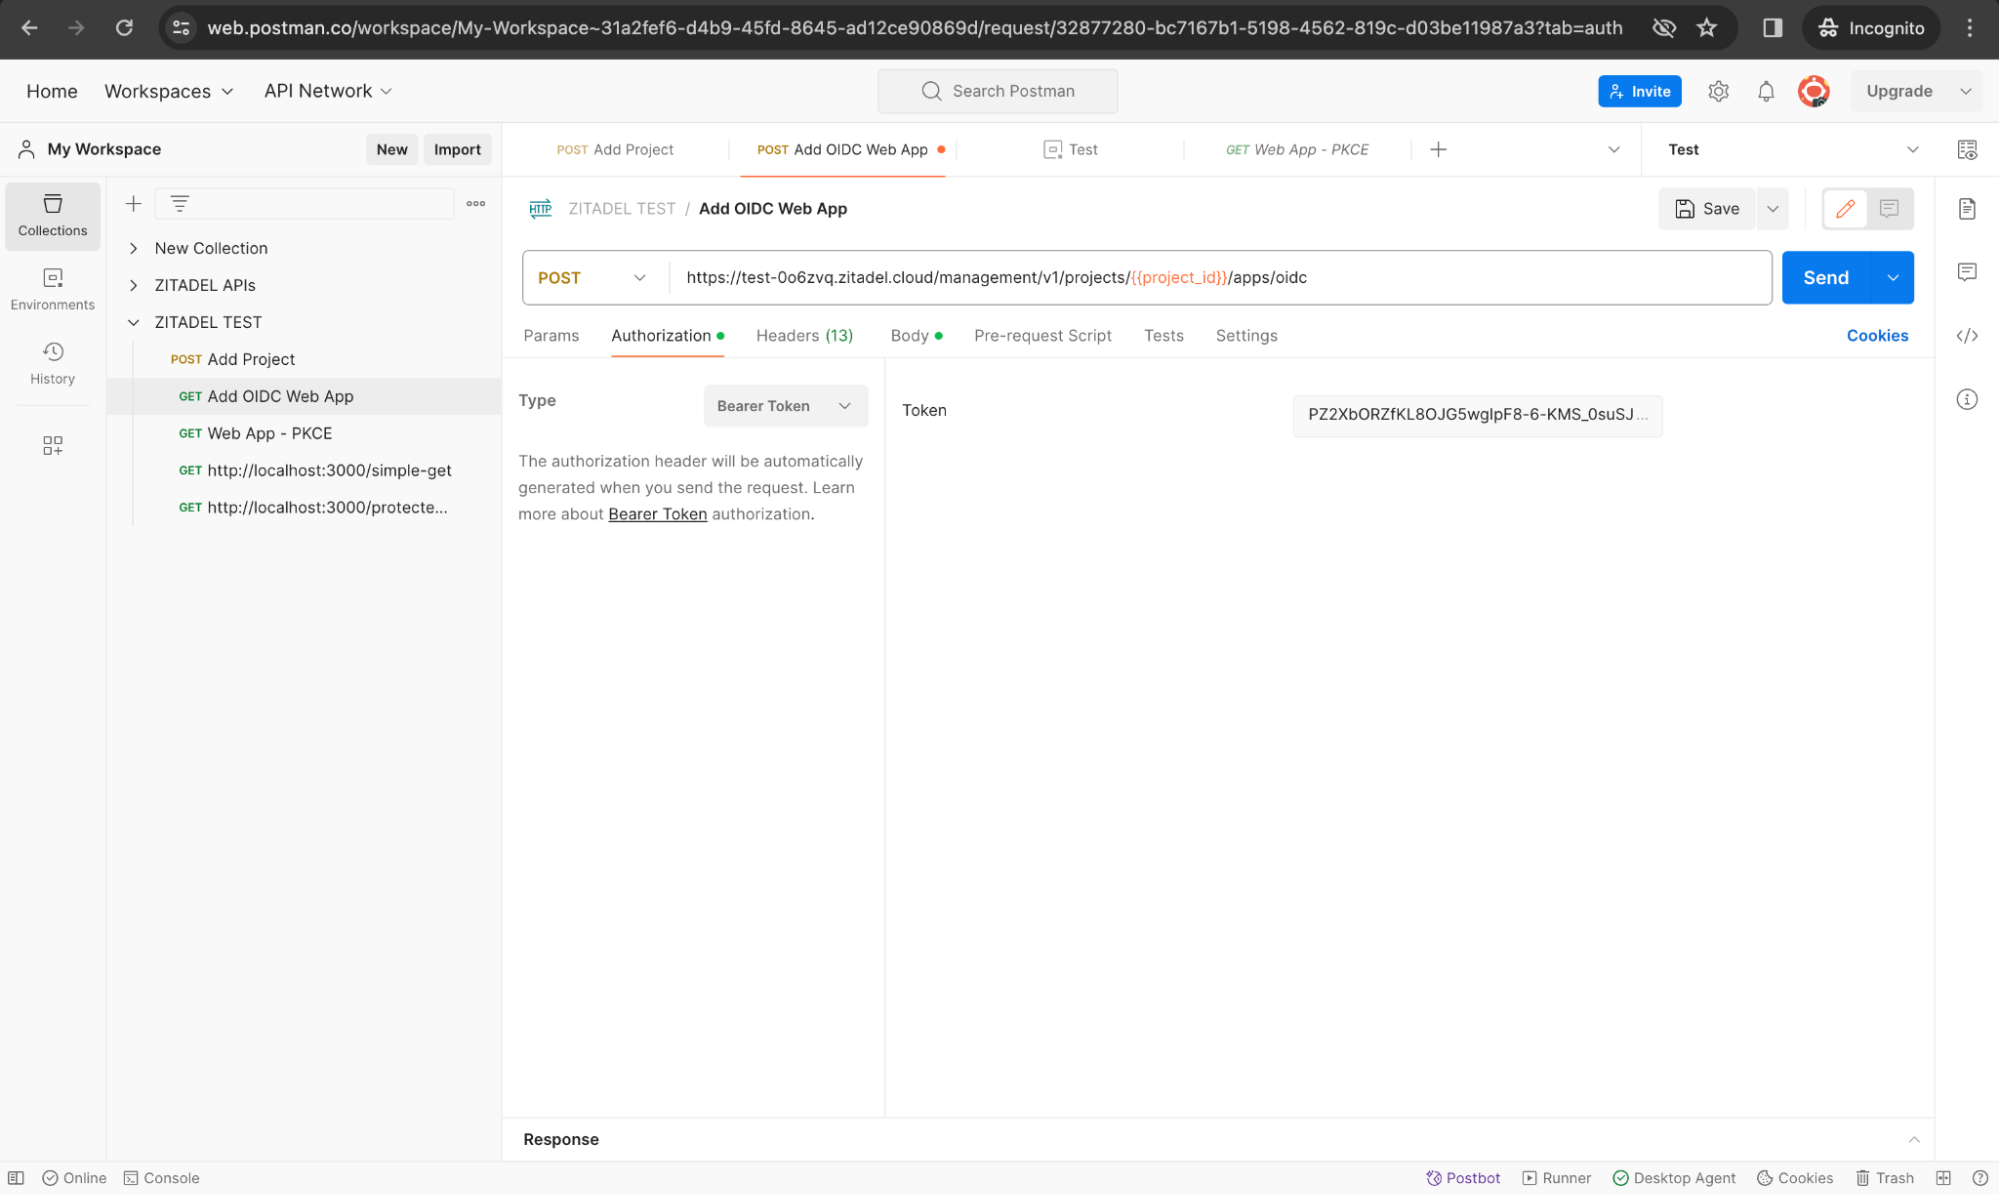
And as before, add the service user’s PAT as the Bearer Token:
And you should get the following response.
Check if the environment variable is also set for the web app’s client id.
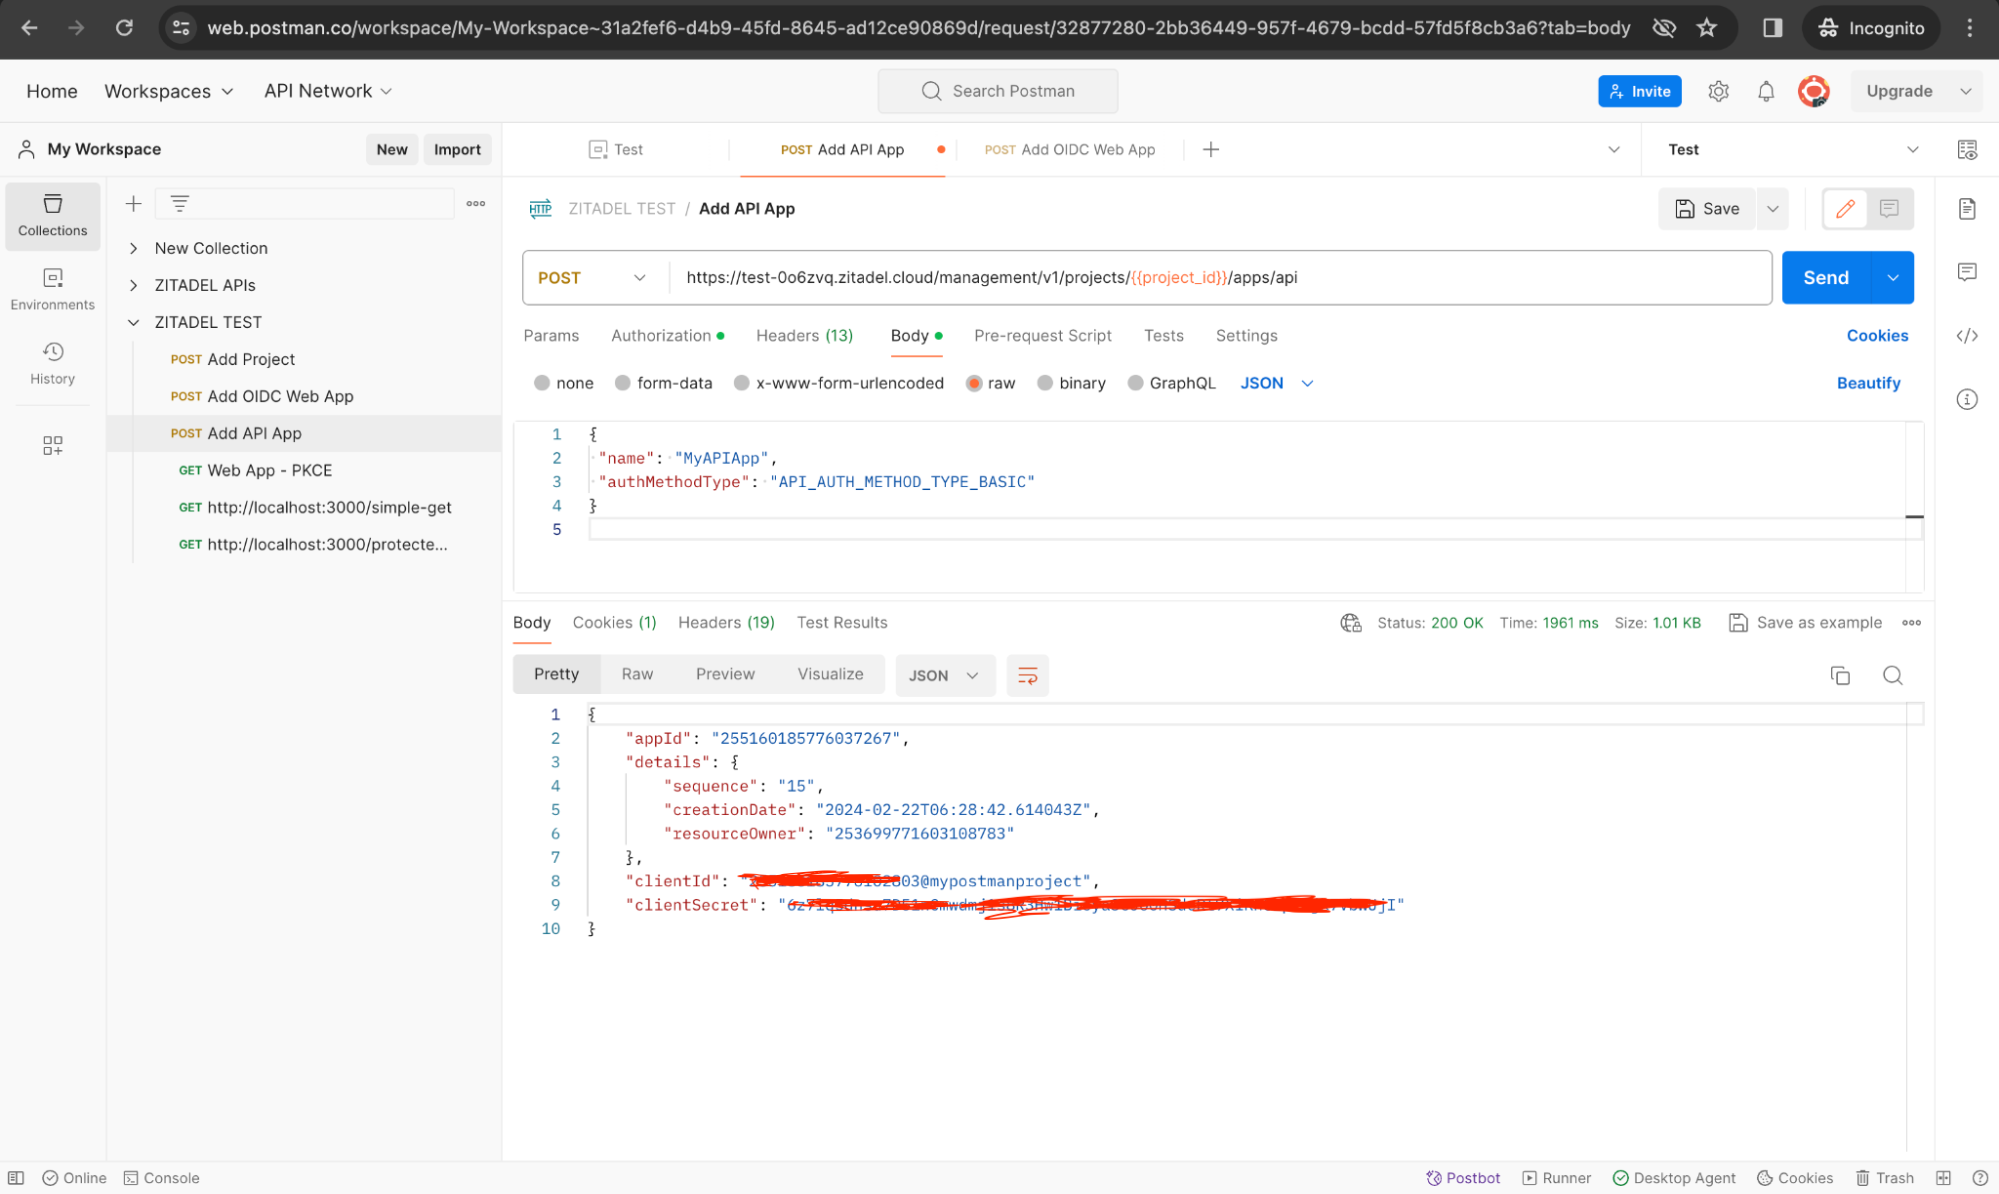
Similarly, you can now add the API application to this project as well. See here for more details about how to call this API. You can duplicate the previous OIDC web app creation request and change the body as follows:
{
"name": "MyAPIApp",
"authMethodType": "API_AUTH_METHOD_TYPE_BASIC"
}
You don’t need any scripts for this request. When you send this request, you will receive the clientId and clientSecret. This needs to be added to the Node API project’s .env file.
Create a User via the Management API
Let’s also add a user to the project via the API.
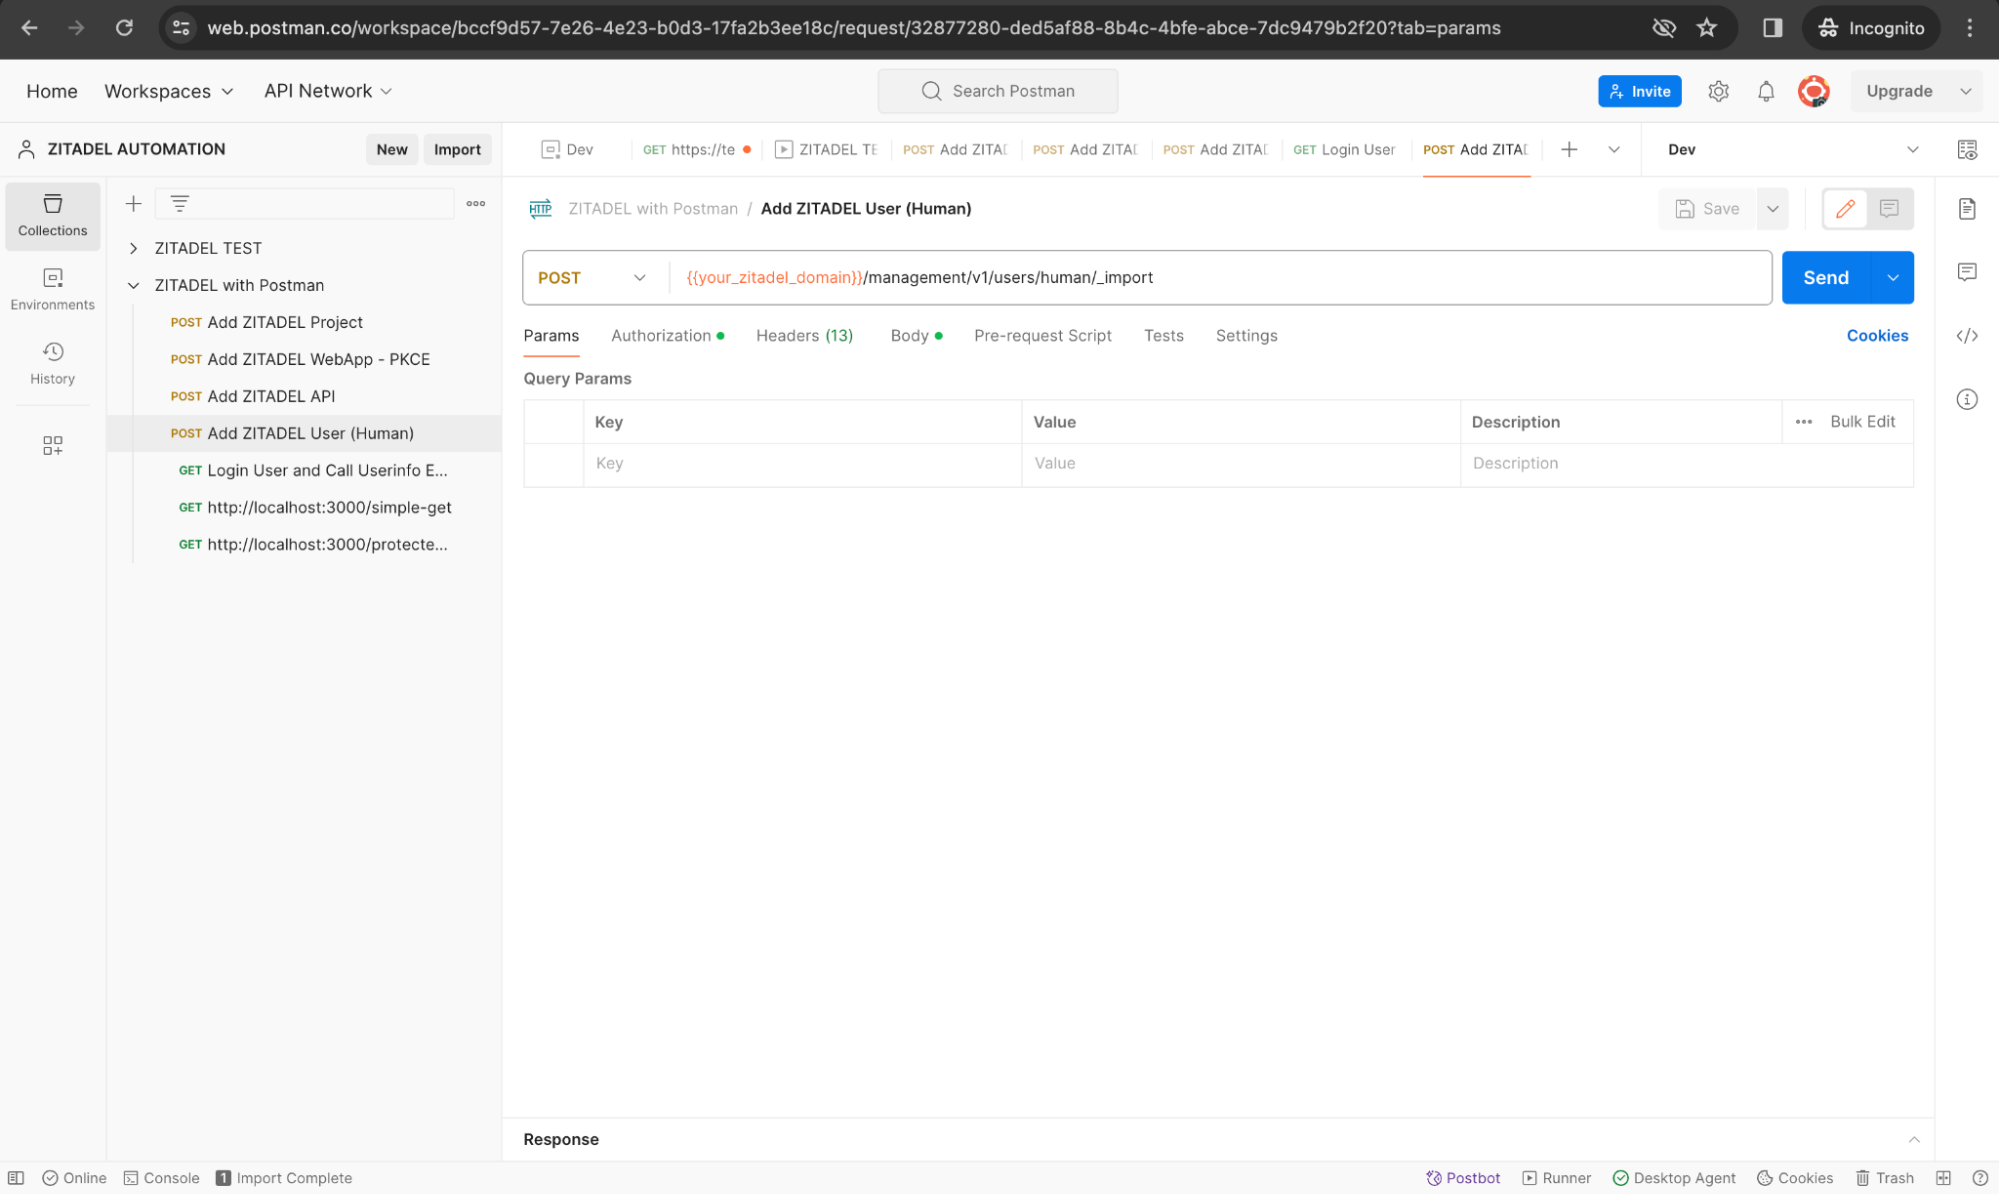
Create the request as shown below (you can duplicate the previous request):
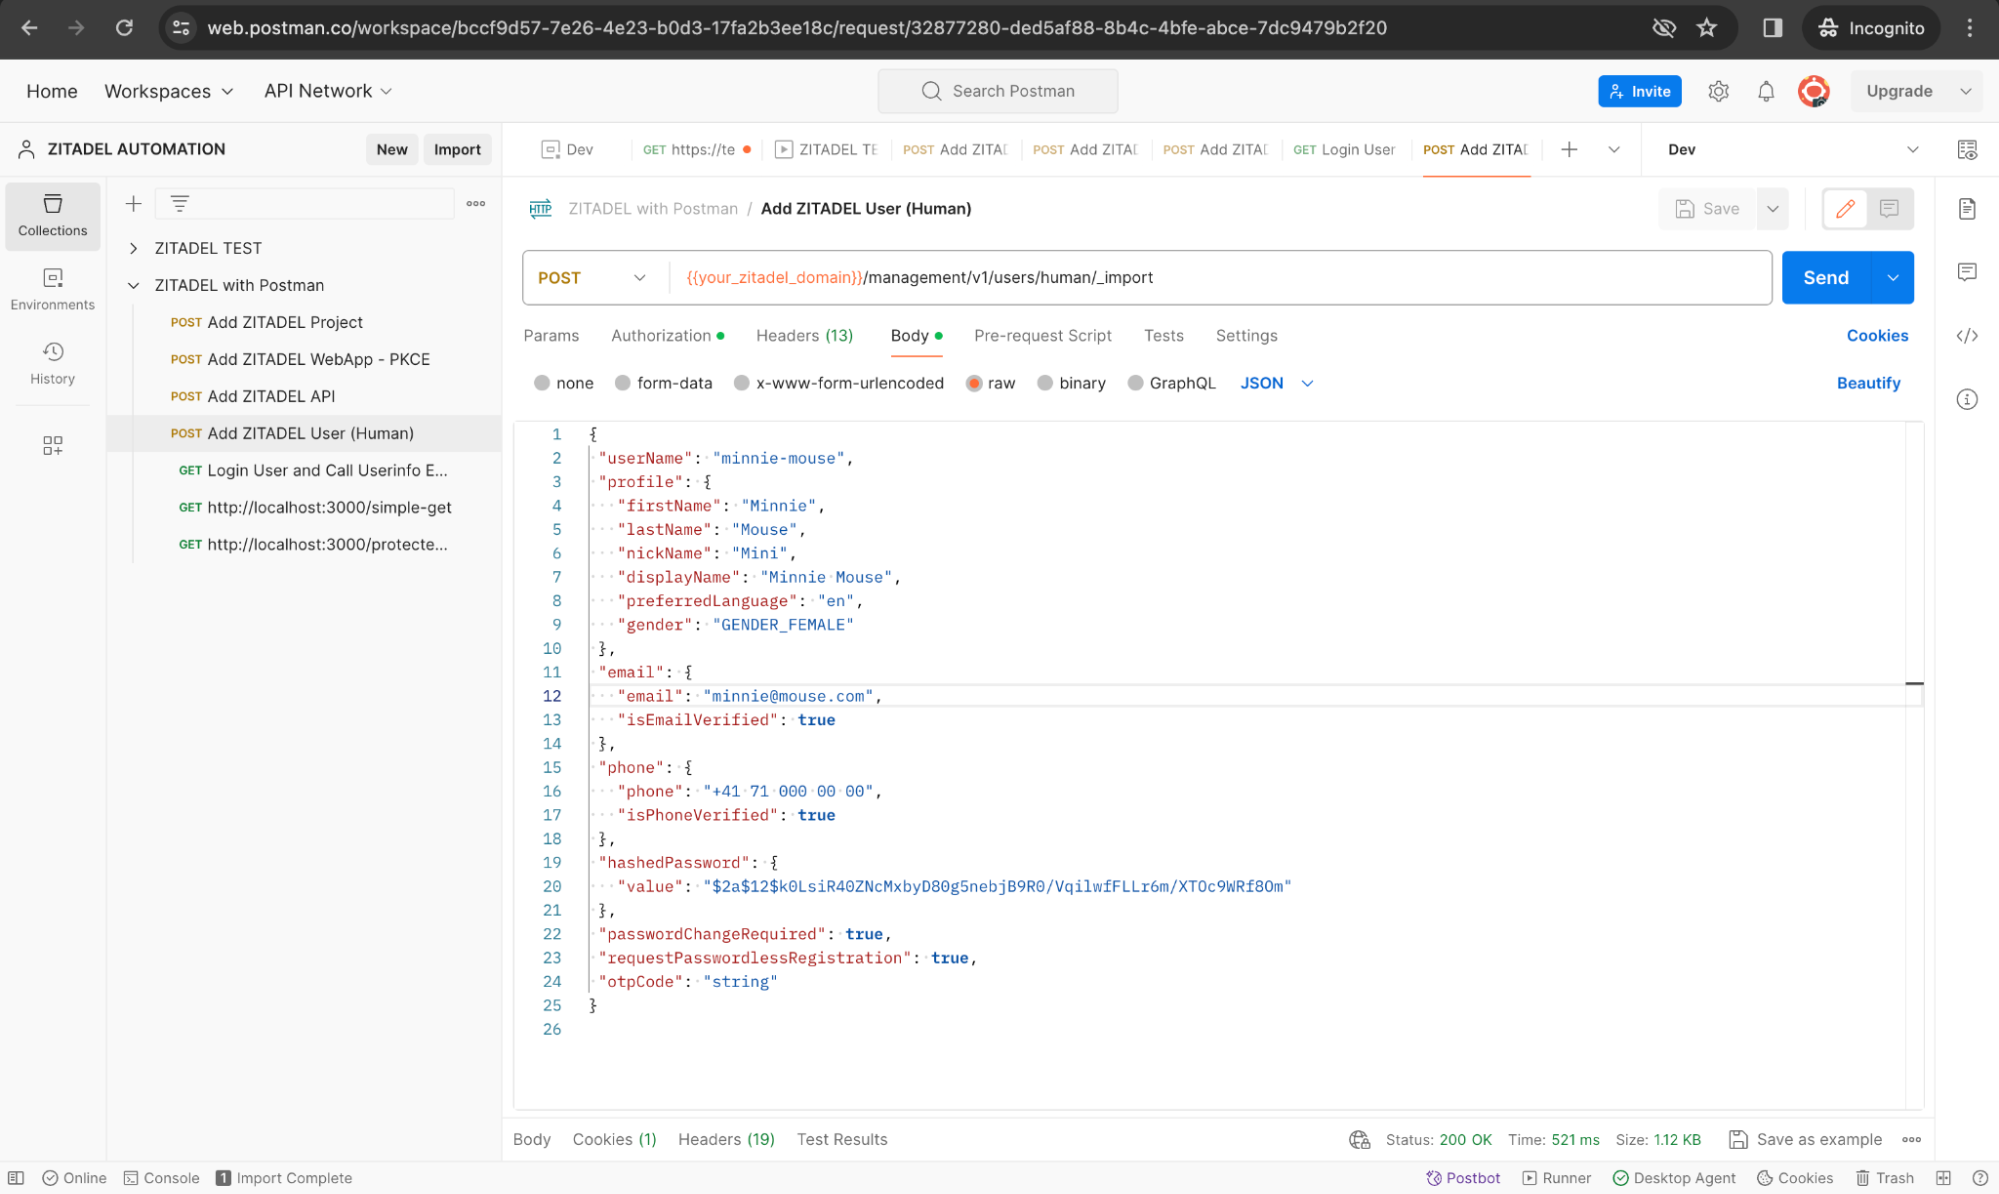
Add the following text to the body:
{
"userName": "minnie-mouse",
"profile": {
  "firstName": "Minnie",
  "lastName": "Mouse",
  "nickName": "Mini",
  "displayName": "Minnie Mouse",
  "preferredLanguage": "en",
  "gender": "GENDER_FEMALE"
},
"email": {
  "email": "[email protected]",
  "isEmailVerified": true
},
"phone": {
  "phone": "+41 71 000 00 00",
  "isPhoneVerified": true
},
"hashedPassword": {
  "value": "$2a$12$k0LsiR40ZNcMxbyD80g5nebjB9R0/VqilwfFLLr6m/XTOc9WRf8Om"
},
"passwordChangeRequired": true,
"requestPasswordlessRegistration": true,
"otpCode": "string"
}
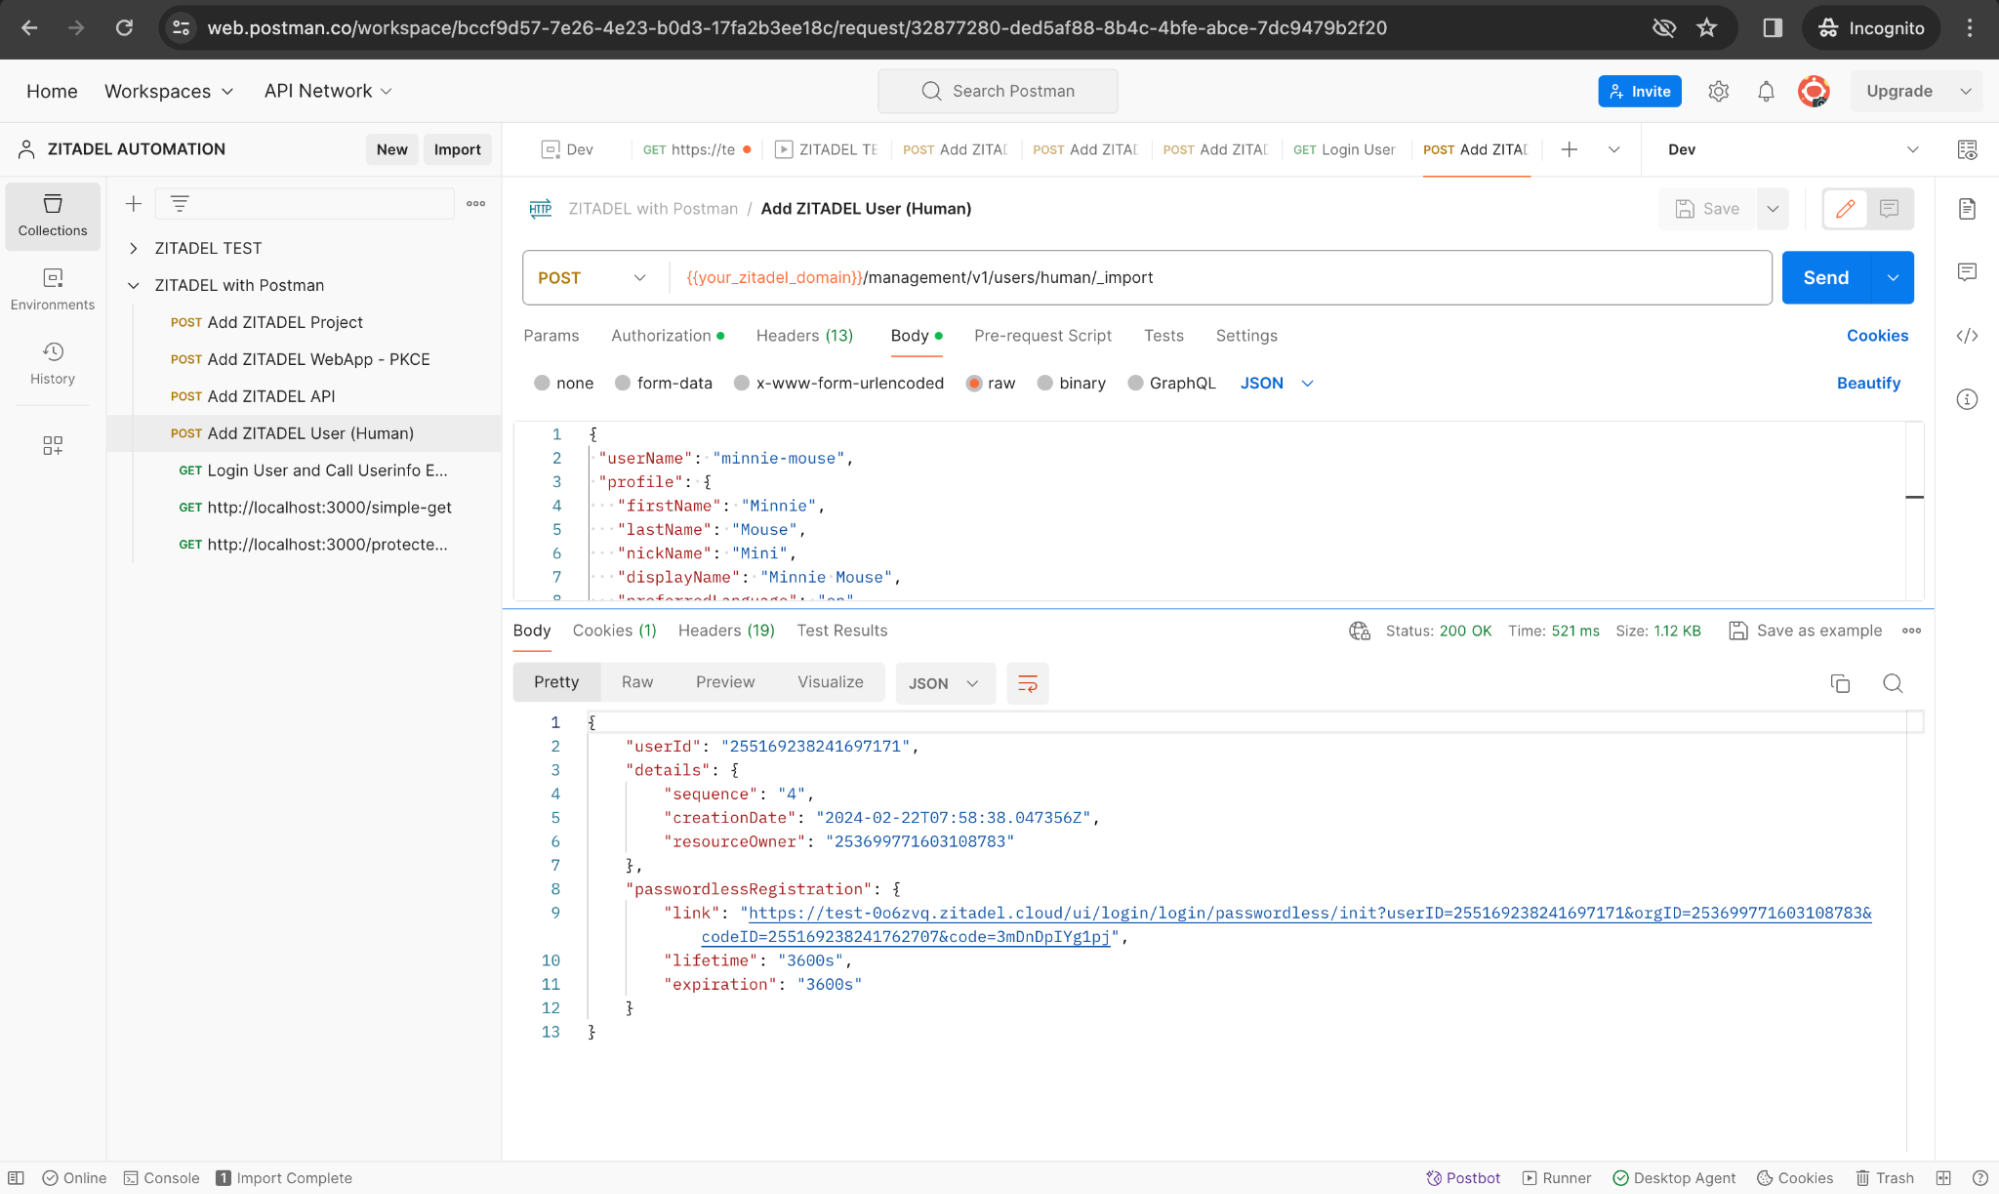
You will receive the following response when you send the request:
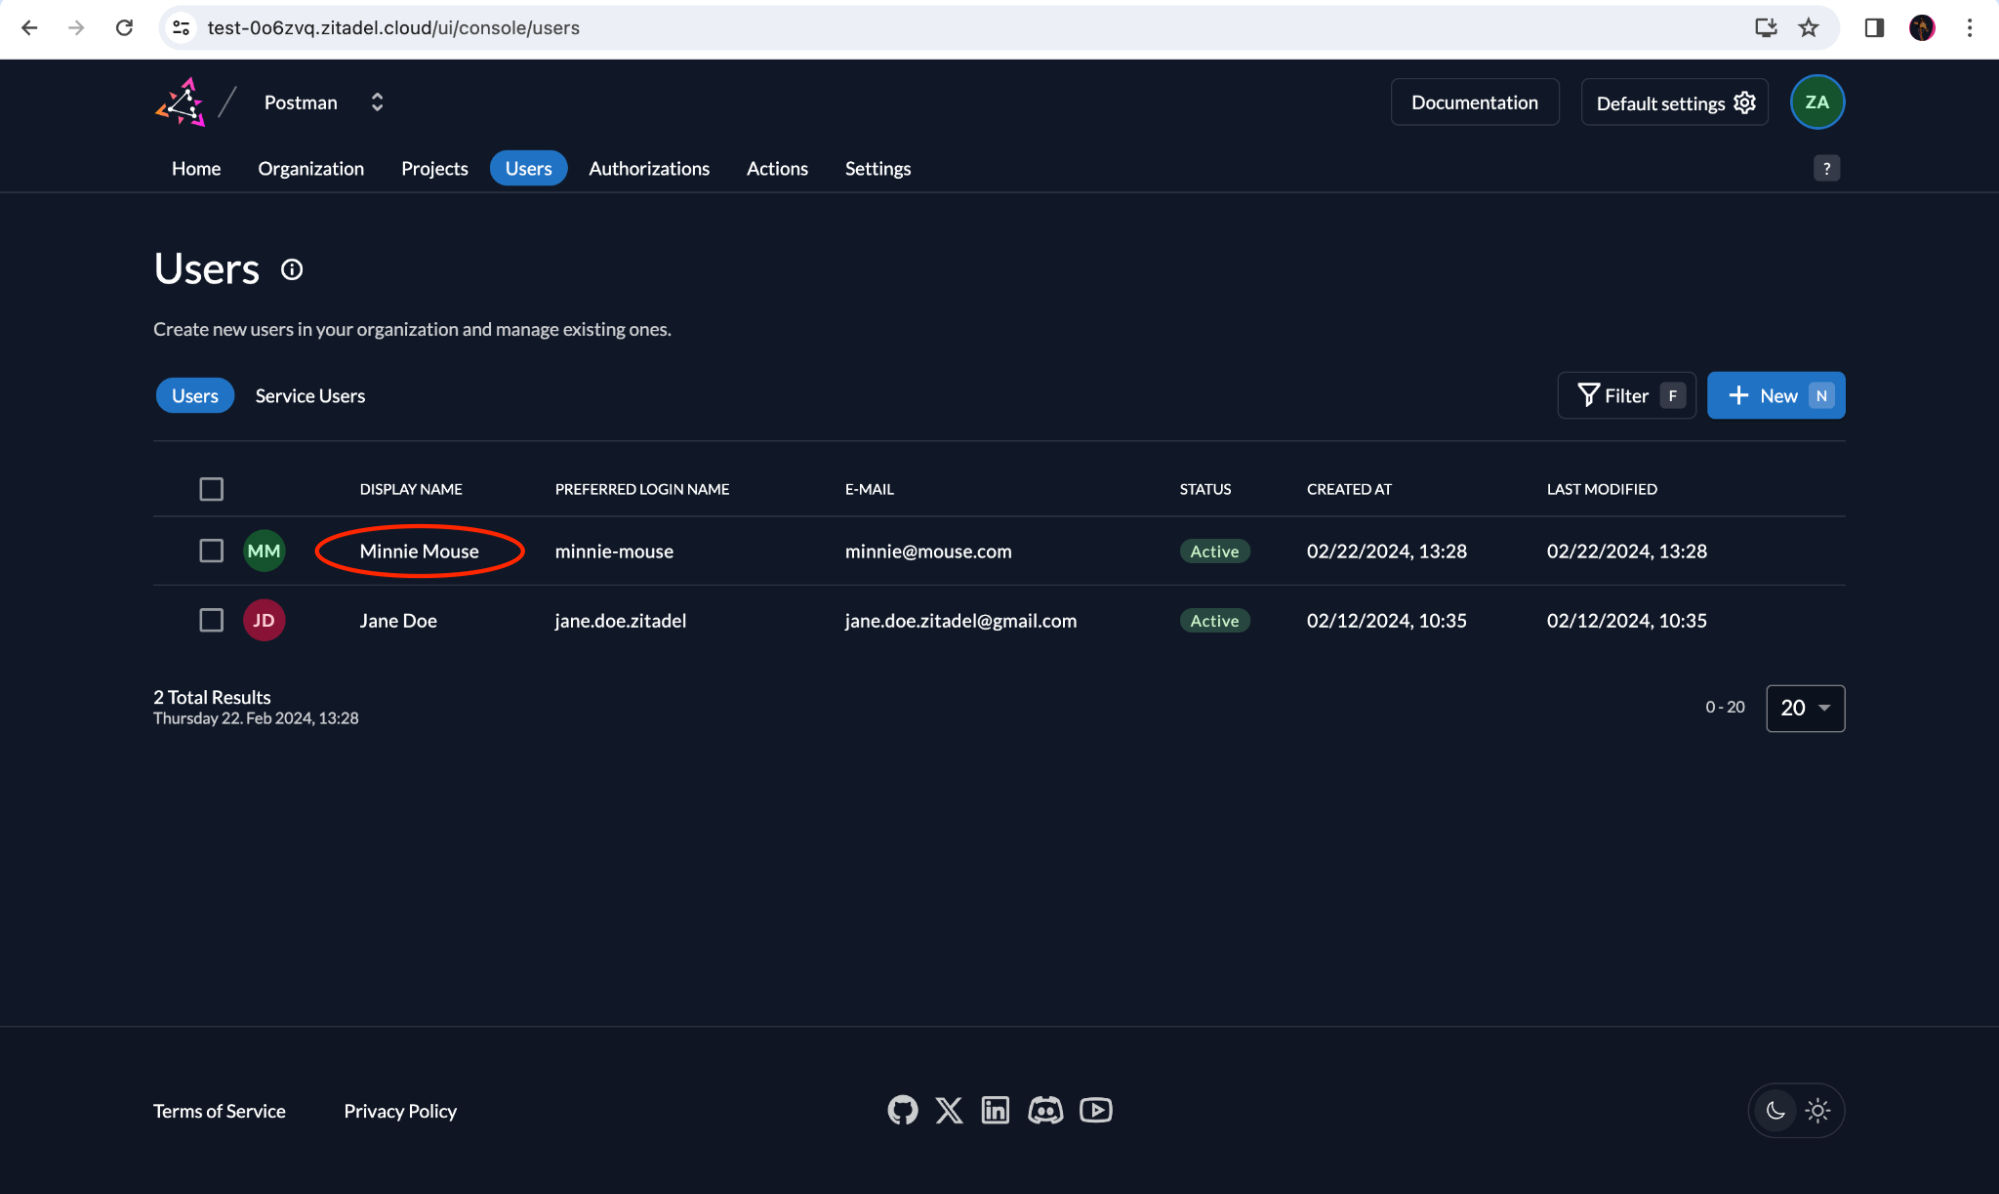
You will now see the new user appearing in the ZITADEL Console:
Try it out Yourself
You can visit our GitHub repository at https://github.com/zitadel/example-postman-collections to download the collection and environment setup that we covered in our Postman blog series. You can add other types of applications, users and roles via the ZITADEL API to this collection and test out various scenarios. Whether you're looking to automate your authentication flows, manage users, or secure your applications, our Postman collection is a great starting point. Happy testing!